
It’s not uncommon to find content creators who choose to have their content on personal blogs/websites. Usually, a goto solution would be to use a CMS (Content Management System) like WordPress or Wix.
However, building a web application with any of these technologies is restrictive due to their monolithic design (tight coupling between client and server). It’s harder to manage and scale these kinds of applications. Some of the likely drawbacks of these CMS applications include:
- Tight coupling between components ( making it harder to test components individually )
- Large and complicated codebase: Making it hard for collaboration
- Less reusability
- It does not follow the SRP (Single Responsibility Principle).
Jamstack to the rescue
With the rise of Jamstack, building web applications that are fast, lighter, decoupled, and easily maintainable is just a couple of tools away. If you’re wondering what Jamstack is all about, I’ve written a practical guide here to get you started:
With Jamstack we can use Static Site Generators like Hugo to generate a site and deploy them on a CDN like Firebase Hosting Service or Netlify.
What you’ll need
- Firebase CLI
- Hugo CLI
- A Firebase account
- Basic knowledge of CLI ( Command Prompt or Terminal )
Hugo
Hugo a popular open-source static site generator that helps us quickly scaffold simple websites.
Installation (Mac)
To get Hugo installed on your Mac Operating System, you need to make sure you have Homebrew installed. Homebrew is a package manager for macOS and Linux.
If you do not already have Homebrew installed, you can install it on macOS with a single command. Open up your terminal and paste this:
/bin/bash -c "$(curl -fsSL https://raw.githubusercontent.com/Homebrew/install/master/install.sh)"
Once the installation is complete, you should be able to access the brew CLI. Verify that you have Homebrew installed by typing: brew
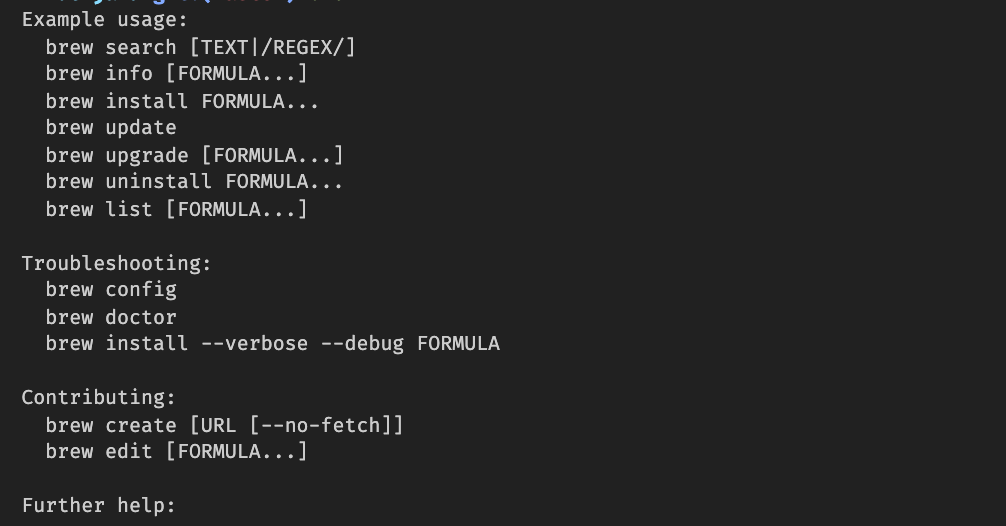
From here you can easily install the Hugo CLI with brew using this command:
brew install hugo
That’s about all you need to install Hugo on your macOS.
Installation (Windows)
The Binary installation is perhaps the easiest way to get Hugo CLI installed on your system. You can download the appropriate version for your platform from Hugo Releases. Once downloaded, you need to unzip and install it. The binary can be run from anywhere, so you won’t need to install it in a global location.
Chocolatey
Chocolatey is the package manager for Windows operating systems, the same way you have Homebrew for macOS. You can find the installation guide here:
Once installed, you can simply install Hugo with this command:
choco install hugo -confirm
Installation (Linux)
You can also use the binary installation to get Hugo on your Linux machine. Alternatively, you can install Hugo with Snap.
First, you need to install the Snap CLI tool.
sudo apt update
sudo apt install snapd
snap install hugo
Great! Now you should have Hugo installed on your system. Next, we need to create a firebase account (if you don’t already have one.).
Firebase
Head over here and create an account. Once you’re logged in, you’d need to create a new firebase project.
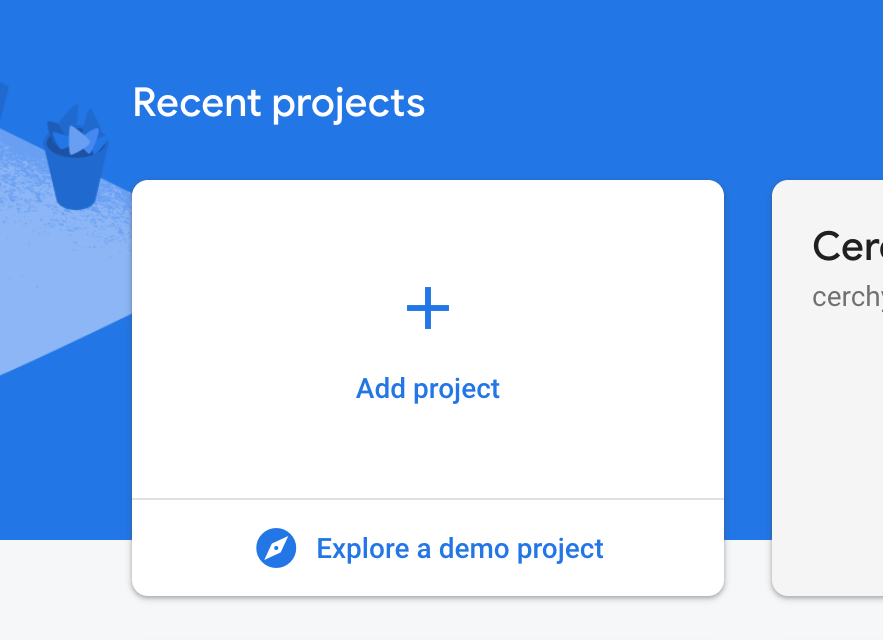
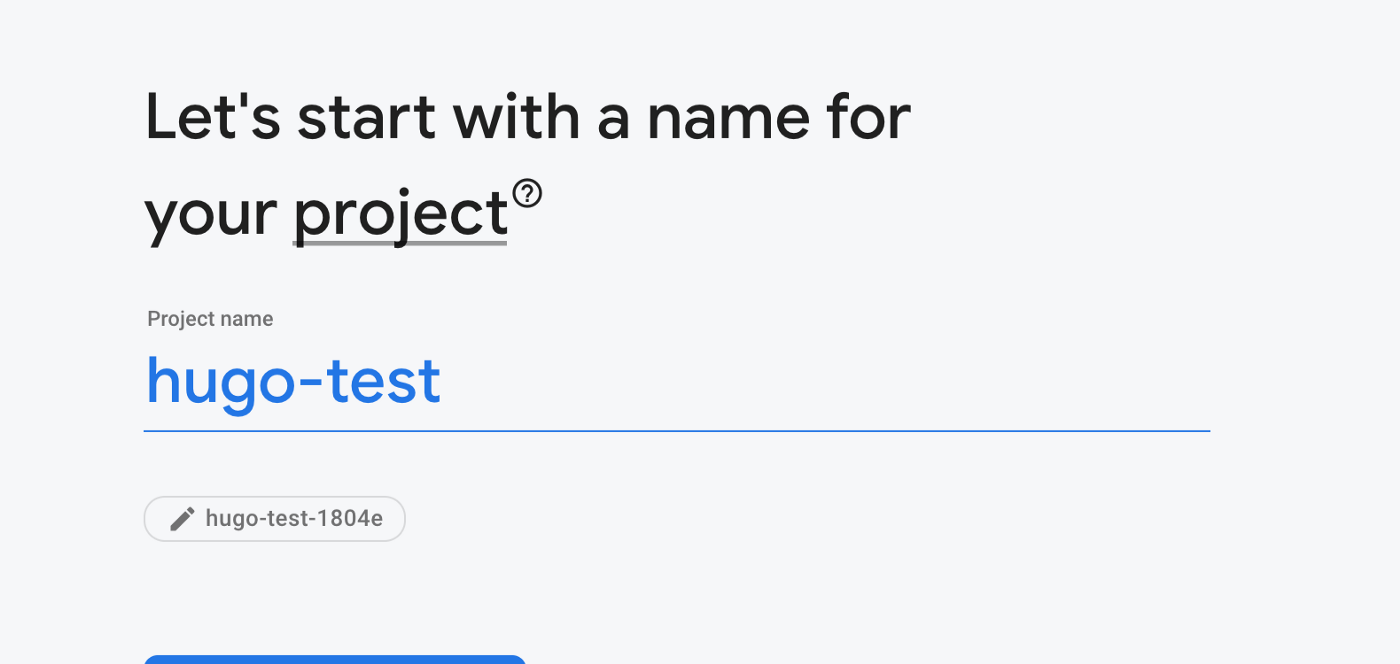
Give your project a name like so:
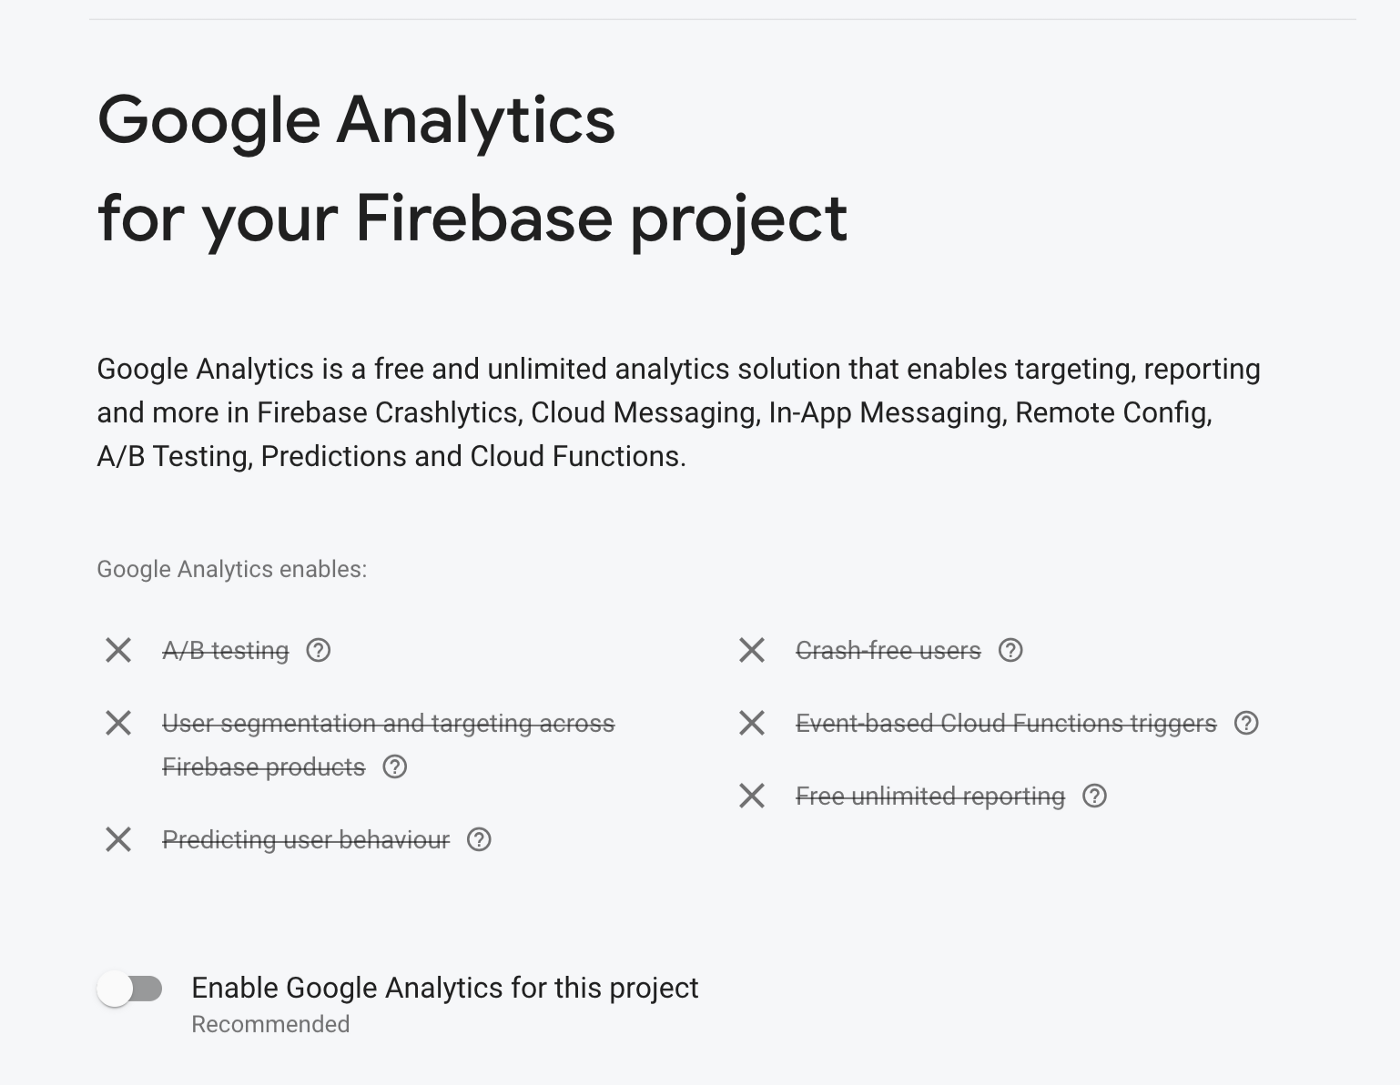
We do not need to enable Google Analytics for this project, so you can comfortably turn that off:
 Grab a coffee while your project is being generated. ☕️
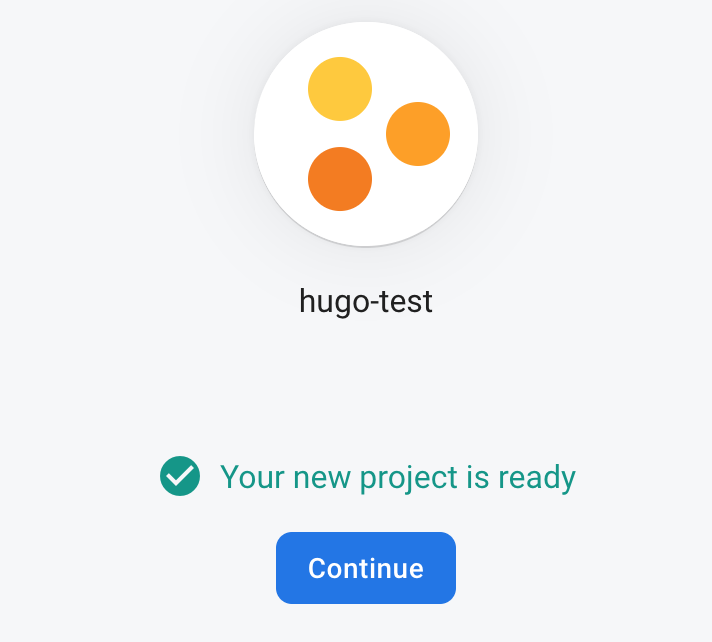
Your project should be ready now. Click “Continue” to proceed to your firebase dashboard.
Firebase offers a handful of services that would help you build and deploy mobile and web applications easily. One of such services is the firebase hosting service. This is the service we will be using.
Firebase CLI
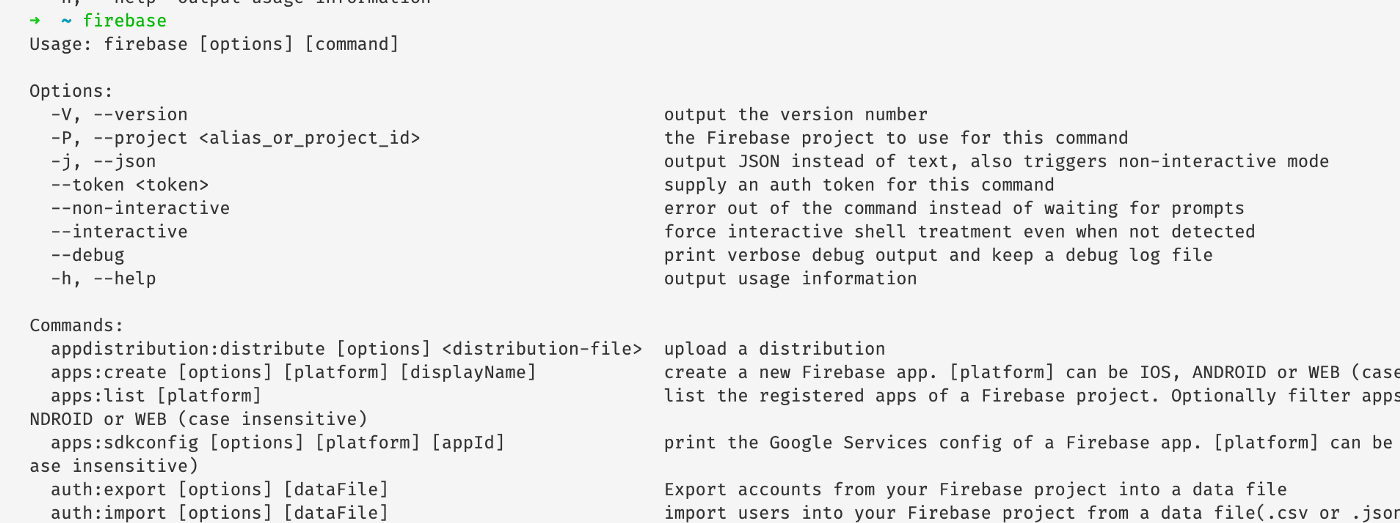
Now that you have your Firebase account set up, and have successfully created a Firebase project, we can proceed to install the Firebase CLI. This command-line interface allows us to perform certain firebase actions from our machine via the terminal.
- Windows: Download the latest binary for firebase tools here
- macOS / Linux: For macOS or Linux users, you can run the auto-install script. The script will automatically detect your operating system and install the latest firebase CLI release.
curl -sL https://firebase.tools | bash
Via NPM
It is also possible to install firebase CLI via NPM (Node Package Manager) if you already have Node installed.
npm install -g firebase-tools
Once the installation is successful, you should have the firebase command available from your terminal.
Generate Hugo Site
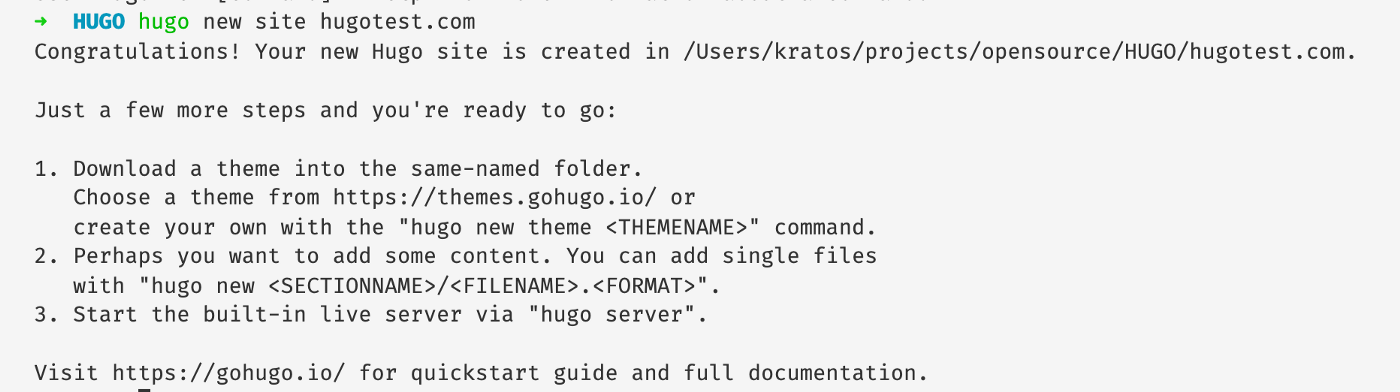
Next, we need to generate our site with Hugo CLI. Open up your terminal/command prompt and type in:
hugo new site site_name
You can decide to give your site whatever name you wish. A new folder will be created with the name you specified.
Hugo CLI scaffolds a project directory structure with empty subfolders, let’s take a closer look at the folder structure that was generated.
I’ll open up the application in VSCode, from the terminal you can type:
code .
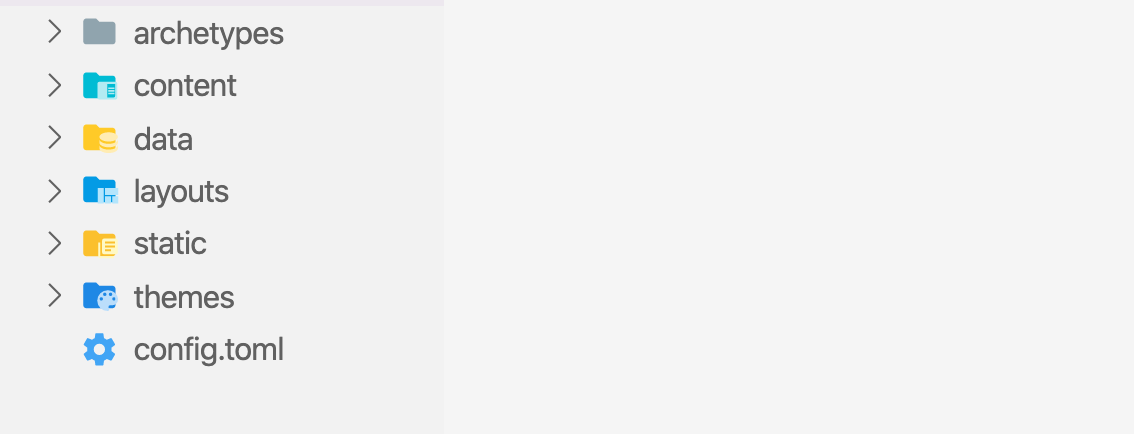
The folders above should be empty when generated. Let’s breakdown what each folder serves for.
most of the information about folder structure can be found here
- archetypes: In Hugo, front matters are metadata that hold tiny information about our site content (date, title, draft). Archetypes contain custom preconfigured front matters.
- content: All content for your website lives inside this directory. Each top-level folder in Hugo is considered a content section. For example, if your site has three main sections —
blog,articlesandtutorials—you will have three directories atcontent/blog,content/articlesandcontent/tutorials - data: This directory is used to hold configuration files used by Hugo when generating your website. You can write configurations in JSON, YAML or TOML.
- layout: This folder is used to store templates in the form of “.html” files that specify how views of your content will be rendered into a static website.
- static: Stores all the static content: images, CSS, JavaScript, etc.
Now that we have a basic understanding of the folders that were generated, we can move on.
The Hugo CLI only generates a skeletal structure for you, it is void of theming and content (all the folders are empty). We, however, have a whirlpool of community themes we can install. Hugo themes can be installed as git submodules.
To install a Hugo theme, from your terminal within your Hugo root project directory, type:
git init$ git submodule github_url
I’m going to install the Ananke theme:
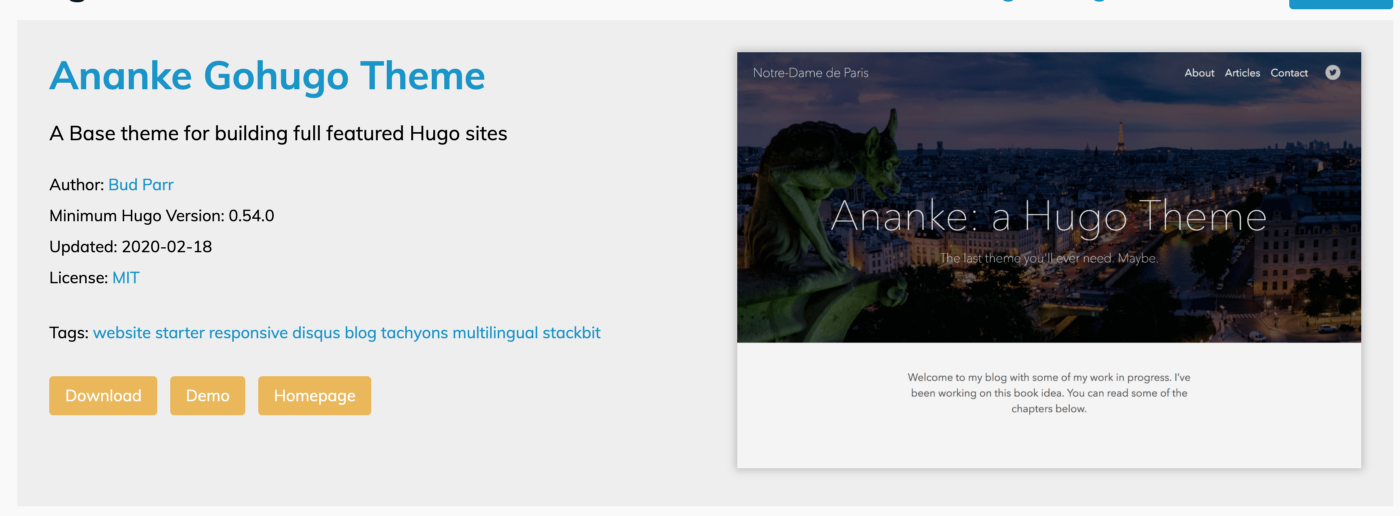
First, we initialize our project folder as a git repository, then install the theme as a submodule.
git init
git submodule add https://github.com/budparr/gohugo-theme-ananke.git themes/ananke
The Ananke theme would be cloned into the directory we specified (/themes/ananke/). Let’s take a look at what the theme directory contains.
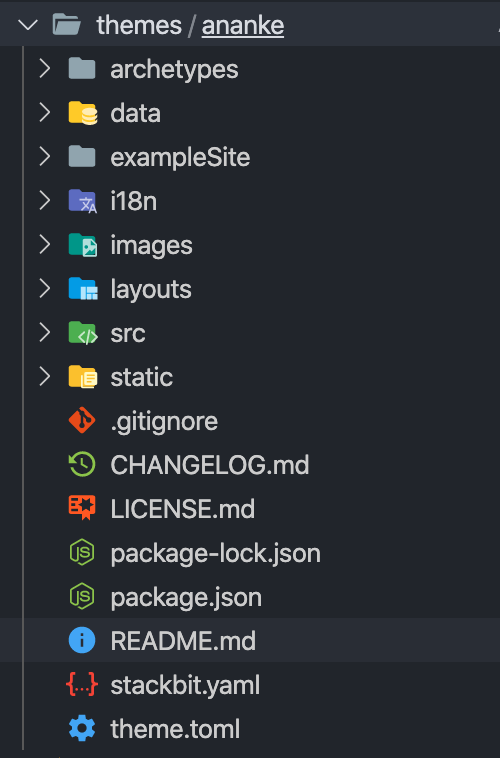
There are two ways to get started using this theme:
- Using the example content provided by the theme
- Creating your content
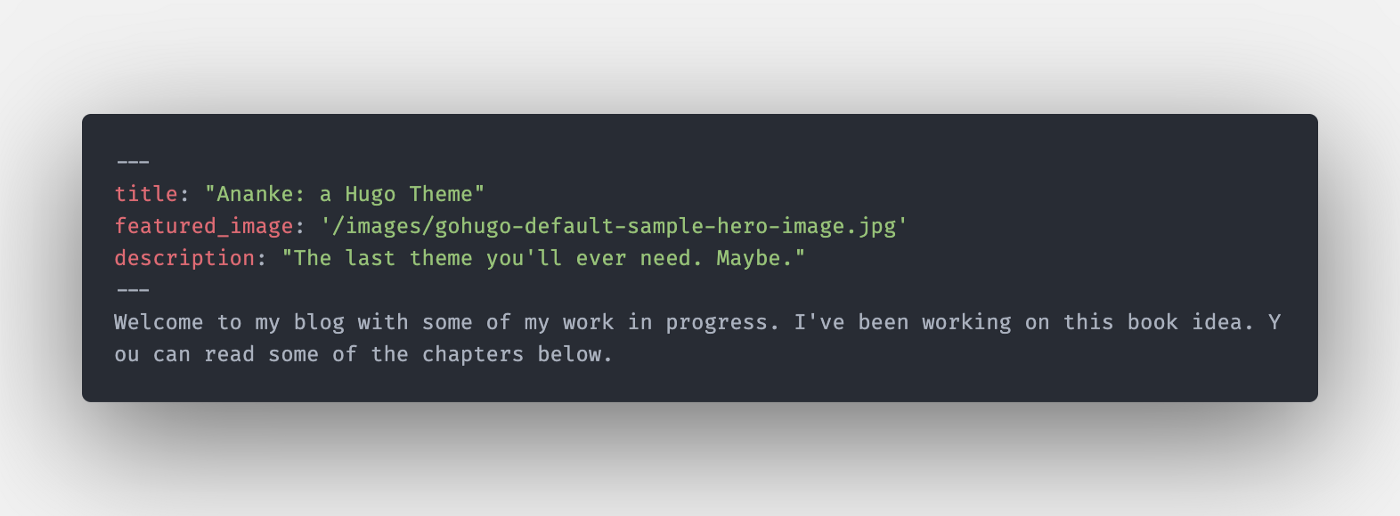
Using the example content
In this case, from the theme directory structure, what we are interested in is the “exampleSite” subdirectory. It would serve as a template to get started quickly with some dummy content. Firstly, what you need to do is copy the content of the “exampleSite” directory into your root directory. You can either do this manually (CTRL + A & CTRL + C & CTRL + V 👴🏼)
or from the terminal:
cp -R ./themes/ananke/exampleSite/* ./
This would add some folders and files (about, post, _index.md) in your “content” folder in your root directory.
This copy would also replace your “config.toml” file. PS: this is a very crucial configuration file.
You need to edit the config.toml file to specify the correct theme name and theme directory, so the Hugo CLI knows what and where to look.
theme = "ananke"themesDir = "./themes"
Once that’s done, you can save and start the Hugo server:
hugo server
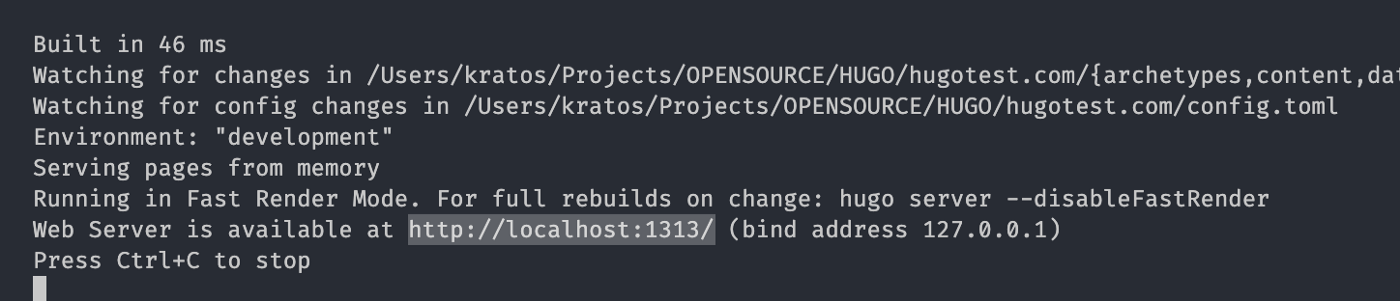
You can navigate localhost:1313 to view your site.

The Hugo has support for live-reload, so you don’t need to reload pages when you make a change.
Let’s try changing the header text, open “_index.md”, you should see the title front matter value:
Try changing it to “My Hugo Test Site” and check the site in your browser.

From here you can keep making changes and creating new pages/posts. You can check out the documentation to learn more about Hugo CLI.
Creating your content
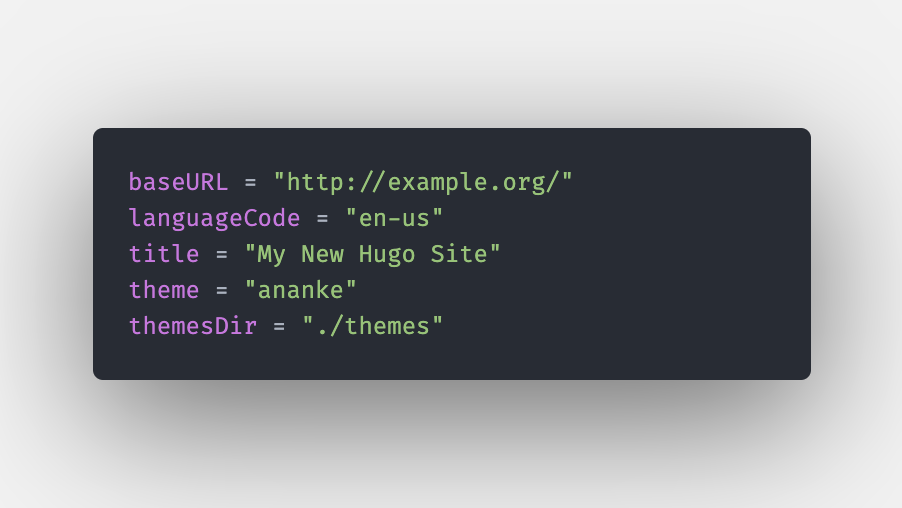
You don’t need to copy the content of the example site directory in this case. Open the “config.toml” file in your project root directory and set the “theme” value to Ananke and also set the theme directory.
theme = "ananke"
themesDir = "./themes"
Your configuration file should look something like this:
Once that’s done, you can create your first post/page using the Hugo CLI.
hugo new index.md
This command generates a new file called “index.MD” (markdown extension) in your contents directory. You can open this file and add some text.
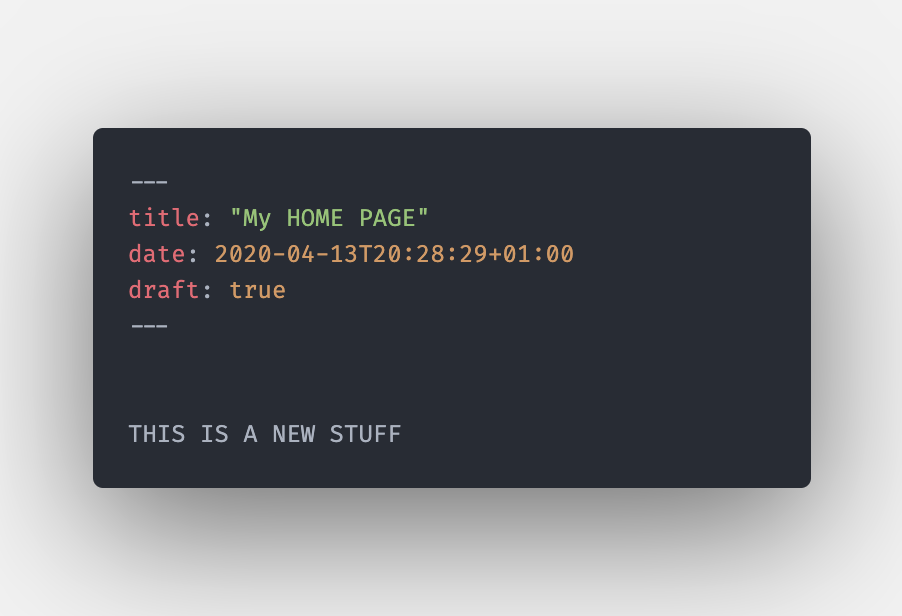
Notice the front matter at the top (title, date, draft)
Save this file and spin up the Hugo server, again.
hugo server -D
Notice here we have a -D flag as opposed to the first time we started the server. This flag enables drafts.
Draft? What does that mean?
When you have a newly generated page/post, it is automatically in drafts and would not be publicly available, until you “publish” it ( in this case set draft to “false”). If however you do not wish to publish just yet, but would still like to work on the page and see your changes, you can start the Hugo server with the -D flag.
Note: All public pages should have the draft value set to false
Great! now we have our Hugo site ready. Next step — deployment.
Deploying to Firebase
We need to first generate the static files for our site using the hugocommand in the root directory.
This generates the static files for your website and copies it into the public/directory by default, although you can customize the output directory in your site configuration by changing thepublishDirfield (we won’t be doing that). From your terminal, type:
hugo
Once your static files have been generated, initialize Firebase from your root directory:
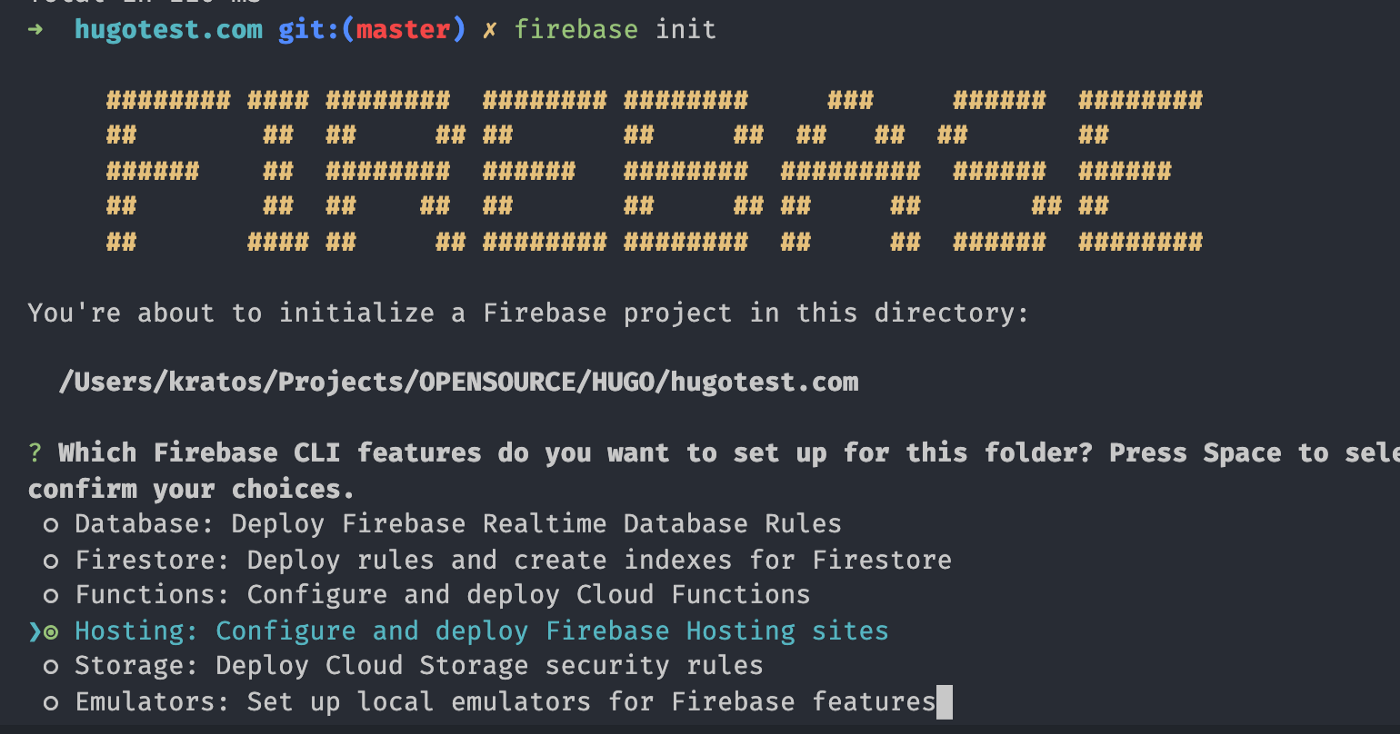
firebase init
You’ll be presented with options to choose from, these options are Firebase services, we’ll only be selecting the hosting service. Once you have the arrow on a service, press the spacebar to select it.
Next, we need to associate the project directory with a firebase project (remember the project we created earlier from the firebase web console? Yeah, that one). Choose “Use an existing project”:
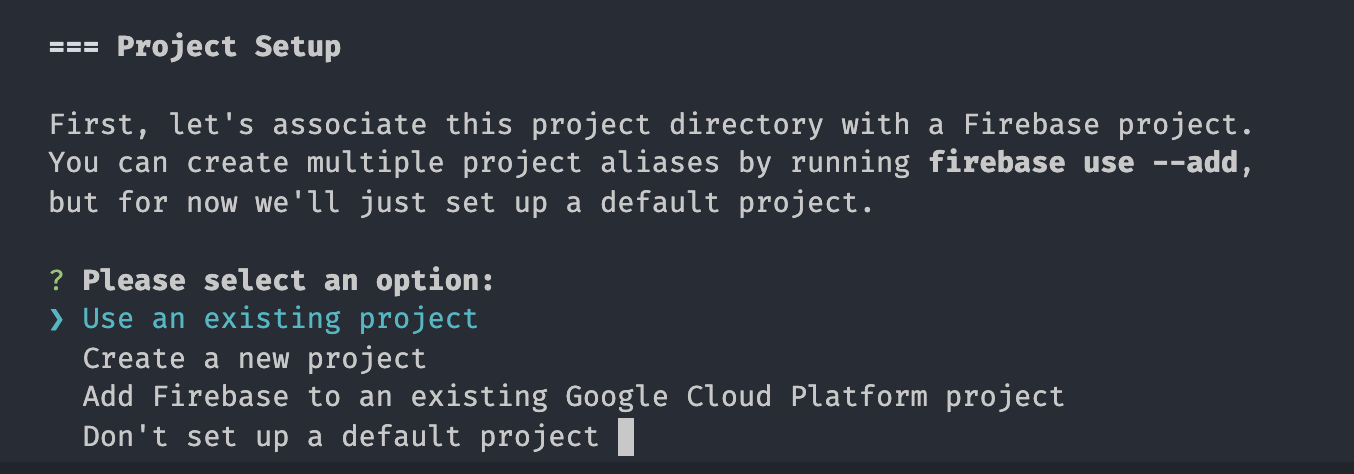
You would be presented with a list of existing projects on firebase. Navigate to the new project we created and select it.

Next, you’ll need to set your public directory (This is the directory that Firebase would publish our site from). Since we already know that Hugo CLI generates static files to the public directory, we can simply press the enter key (as Firebase uses “public” by default).

When asked whether to configure as a single page app, Choose No by typing N. If you’re asked whether to overwrite files in the public folder, just choose Yes for now.
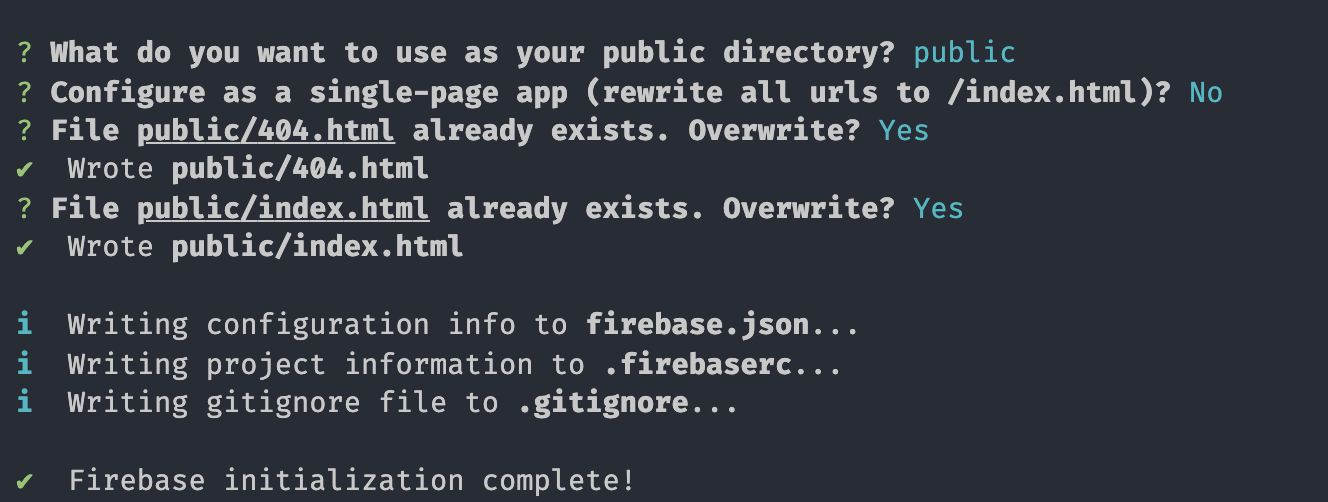
Your firebase setup should now be complete.
Next, we’ll regenerate our static files with Hugo CLI, then deploy with Firebase CLI. Type “hugo” from your terminal, then type “firebase deploy”.
hugo
firebase deploy
Your deployment should be successful at this point. Firebase generates a Hosting URL for your site as well, you can copy the URL and open in the browser to view your site.
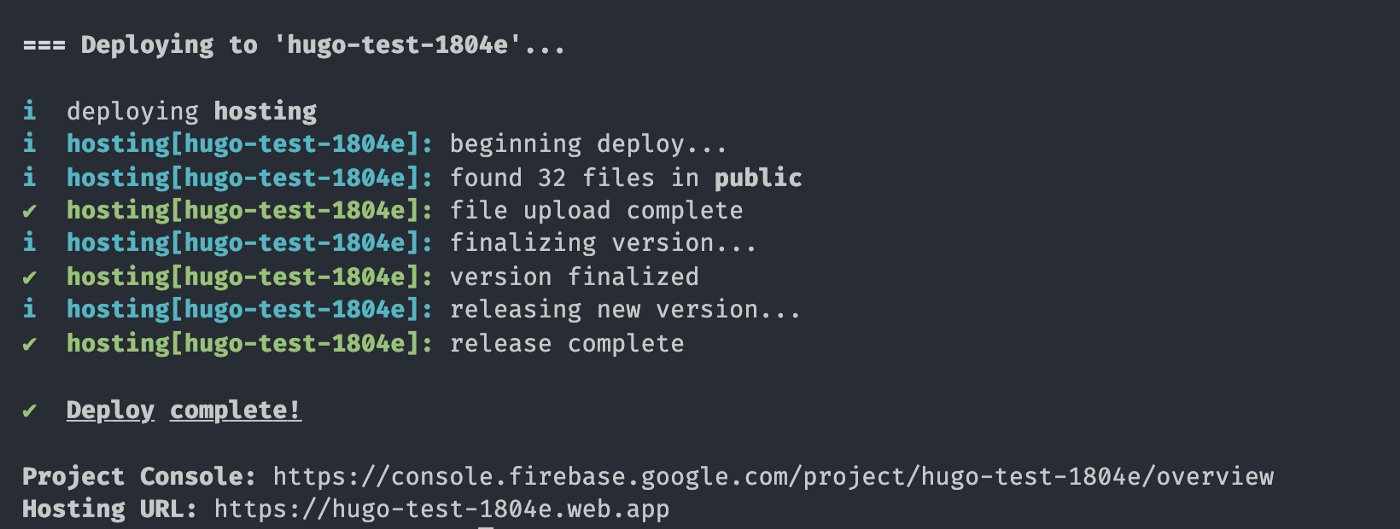
You can equally access the site from a firebaseapp.com subdomain.
Custom Domain (Extra)
If you want to go a step further and use a custom domain name for your site, Firebase console has a section to add a custom domain. From the Firebase console, select Hosting:

Next click on “Add Custom Domain” and go through the process of setting it up and verifying ownership.
Well, it’s been a long ride. Cheers if you made it this far.
You can find all the project files here:
Cheers ☕️