Modular programming is the process of subdividing a computer program into separate sub-programs. A module is a separate software component. It can often be used in a variety of applications and functions with other components of the system. — www.techopedia.com
Although this post emphasizes Modularization, we will go through a short basic of Classes and Inheritance, a part of the Object-Oriented Methodology that Java enforces to put the piece together.
Classes ☕️
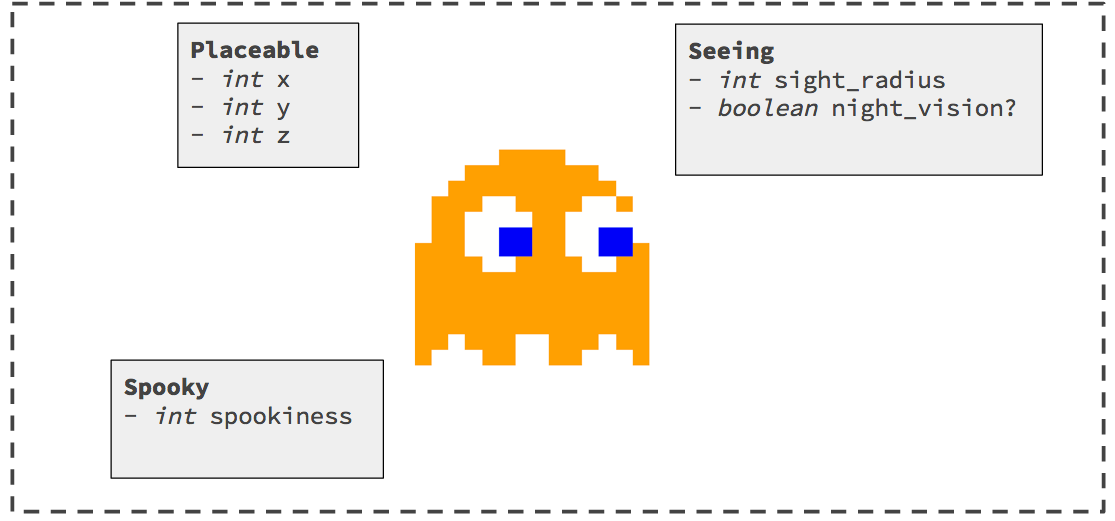
If we didn’t already know, Everything in Java is, in one way or another, associated with a class. Why? Because Java is an Object Oriented Programming language, and like in every OOP Language, Everything is an object. And for Objects to have a “Grouping” or “Blueprint,” they need to belong to or be classified within a class.
Here’s an example.

Vehicles include wagons, bicycles, motor vehicles (motorcycles, cars, trucks, buses), railed vehicles (trains, trams), watercraft (ships, boats), amphibious vehicles (screw-propelled vehicles, hovercraft), aircraft (aeroplanes, helicopters), and spacecraft. — Wikipedia
Following Wikipedia’s definition of Vehicles, although we might easily categorize the blue car and the blue bicycle as two distinct objects, we can equally say they are both “Vehicles” therefore, belong to the group or class of “Vehicles.” We also see how classes act as blueprints for several other kinds of objects (included above).
Although these objects belong to the same class, they do not necessarily perform the same “functions/actions.” In this case, we call these functions/actions “methods.”
Methods 🏃🏼♀️💨
We can say that a method is any action that an object can perform. Actions include fly, drive, ride, and reverse. However, objects of the same class ( like the car and bicycle in our example ) may not have all methods in common, just the same way a car cannot be pedaled; likewise, a bicycle cannot be driven. Think of Methods as Verbs.
public class Car {
  public void drive() {}

  public void reverse() {}

  public void park() {}
}
Attributes 🎨
Attributes are properties of an object. They are those things that define an object or differentiate one object from the other. “a blue car” — the word “blue” tells you a little more about the car. Think of Attributes as Adjectives. You could also say that class attributes are variables within a class.
public class MyClass {
  int x = 5;
  int y = 3;
}
Attributes translate to variables.
Inheritance 👩👩👧👧
It’s nice to have a bunch of objects and their collective methods and attributes. However, what would be nicer is for us to share these methods and attributes across other related objects, and why would we want to do this? Well, mostly for re-usability and maintaining the DRY (Do not Repeat Yourself) principle. This is where Inheritance comes in handy. Inheritance allows one class ( subclass/child ) to “inherit” the attributes and methods from another class ( super-class/parent ).
We won’t go too deep into the details around inheritance; we’ll just see a practical example in Java. But for notes, we have several types of inheritance:
- Single ( we’d be touching this )
- Multiple
- Multilevel
- Hierarchical
- Hybrid
You use the keyword extends to declare a child class of a parent class in Java.
Modularization 🍰
Modularization involves the process of breaking a program into components or sub-programs.
[‘😚’ + ‘❤️’ + ‘😉’] = 😘
Hopefully, the emoji above is a good enough illustration. The major advantage of modularizing our programs is that it helps us detect and debug issues faster and more efficiently.
Packages
A package in Java is used to group related classes. A package is basically a folder of related classes. Packages come in handy when building a more maintainable code and are mostly of two types:
- Built-in Packages (Packages from the Java API )
- User-Defined Packages (Packages you create )
We’ll only be looking at the second one.
Putting it All Together
Let’s run through a very basic example. We’ll build a Calculator class (parent class) with class methods and attributes, then extend a MyCalculator subclass (child class) from it that will inherit its methods and attributes. We’ll use Modularization by default, as we would separate each class file and put them in a single folder (package).
Note: You should have only one class per package file
First, we’ll have our package folder structure like so:
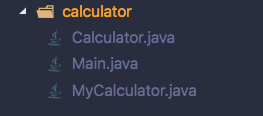
Create a package folder called calculator with these classes
Note: I’ll be using Visual Studio Code for this lesson. “Why??” As much as it’d be great and nice to have an IDE like Netbeans or IntelliJ abstract all the compilation details from you, one problem is that you may not entirely understand the process and adequately debug issues when the need arises.
Calculator.java 👨🏽💼👩🏼💼
public class Calculator {
  int z;

  public void addition(int x, int y) {
    z = x + y;
    System.out.println("Addition: " + z);
  }

  public void subtraction(int x, int y) {
    z = x + y;
    System.out.println("Subtraction: ", z);
  }
}
We’ve declared a parent class Calculator. It has one class attribute, z and two class methods, addition( ) and subtraction( ). The addition method takes two arguments and prints out their sum, while the subtraction method prints out the difference.
MyCalculator.java 👨👧
public class MyCalculator extends Calculator {
  public void multiplication(int x, int y) {
    z = x * y;
    System.out.println("Product: " + z);
  }
}
Here we’re declaring a child class MyCalculator which inherits from the parent class Calculator. Notice we used an undeclared variable, z. We don’t have to declare the z variable again cause the child class (MyCalculator) inherits all attributes and methods from the parent ( Calculator ). And Since we already declared z in the parent class, we do not need to repeat the declaration in the child class.
We have also created a new method, multiplication which takes two integer variables and returns their product.
Note: The new method created in our child class cannot be accessed from our parent class. the inheritance doesn’t work vice-versa. Note (again): To inherit from a parent class, use the “extends” keyword.
Main.java 🚀
There’s nothing fancy about this class; it’s basically where we have our main method. If you didn’t already know, the main method marks our program’s initialisation; Java looks for this guy.
public class Main {
  public static void main(String[] args) {
    int a = 20, b = 10;
    MyCalculator demo = new MyCalculator();

    demo.addition(a, b)
    demo.subtraction(a, b)
    demo.multiplication(a, b)
  }
}
Run Program
Okay, this is the part where we run our program. Because we are not using Netbean or IntelliJ, we will be manually compiling and running our program.
There are two major steps to successfully running a Java Program:
- The compilation ( javac )
- Execution ( java )
For the compilation, we use the javac command
For Execution, we use the java command
Note: When dealing with just a single Java file/class, we would usually run both commands for just that class. But in this case, where we have multiple related classes, it would be nice to compile all the programs simultaneously. Thankfully we can.
Open up your Command-Line or Terminal, Depending on your operating system.
For Windows: Press the Windows key + R, Then type in “cmd” (without the quotes) and press enter. You should see the command line pop up.
Now we need to go into the directory where we saved our program. I’ll assume it was saved on the Desktop, and the folder name is “calculator”. To go into your program directory, type:
cd Desktop/calculator
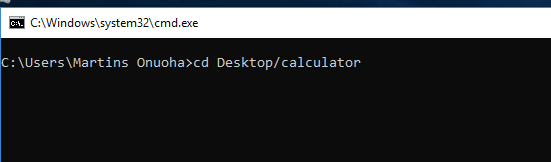
You should now be in your project directory.
Compilation
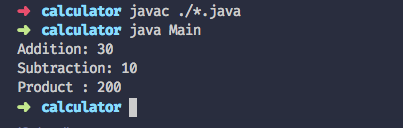
To compile all the classes in the directory at once, Type:
javac ./*.java
Note: This command tells the java compiler to look in the current folder, find anything that have the “java” extension ( in this case, Calculator.java, MyCalculator.java & Main.java) and compile them.
Another way to compile the classes would be one at a time: If you would rather go with this method, you need to carry out the compilation in this order:
- Compile The parent class (javac Calculator.java)
- Compile The Child class (javac MyCalculator.java)
- Finally, Compile the Main class (javac Main.java)
This will create a .class file for each class ( MyCalculator.class, Calculator.class, Main.class ).
Execution
To run your program, you’d only need to run the class that contains the main method (in our case Main.class)
Type:
java Main
You should get the following output:
🎉🥂 We’ve come to the end of this short😅 tutorial. Hope this helps someone.
Cheers ☕️