WordPress has been the go-to solution for building websites for the longest of time. From simple static landing pages to blogs and e-commerce websites. However, one major setback it has is scalability & reusability. Say you wanted to use your content on other clients or services, a mobile application, for example, it’s mostly a pain to achieve because of the monolith structure of WordPress.
WordPress, however, added the WordPress REST API that allows developers to access and use data outside of WordPress. The only problem with this is, the data from REST API is bloated, and contains a lot of unnecessary things. This is why we’re choosing to use GraphQL.
We’ll be working with an offline version of WordPress, although you can easily get a full WordPress installation when you purchase a hosting plan from a hosting provider. You would however only need this when you have to host your WordPress backend.
I’ll walk you through how to set it up locally.
Getting Started
Requirement:
Download the latest version of WordPress here. This will download a .zip file to your local machine.
Unzipping the file should give you a WordPress folder that contains all the essential files needed by WordPress. Open up your Terminal or Command Line Prompt and walk your way into the WordPress folder.
cd ~/Downloads/wordpress
Once you’re in the WordPress folder, You’ll need to use the PHP interactive shell to start a simple server.
Make sure you’re in the root directory that contains the “index.php” file, from there run:
php -S localhost:8000
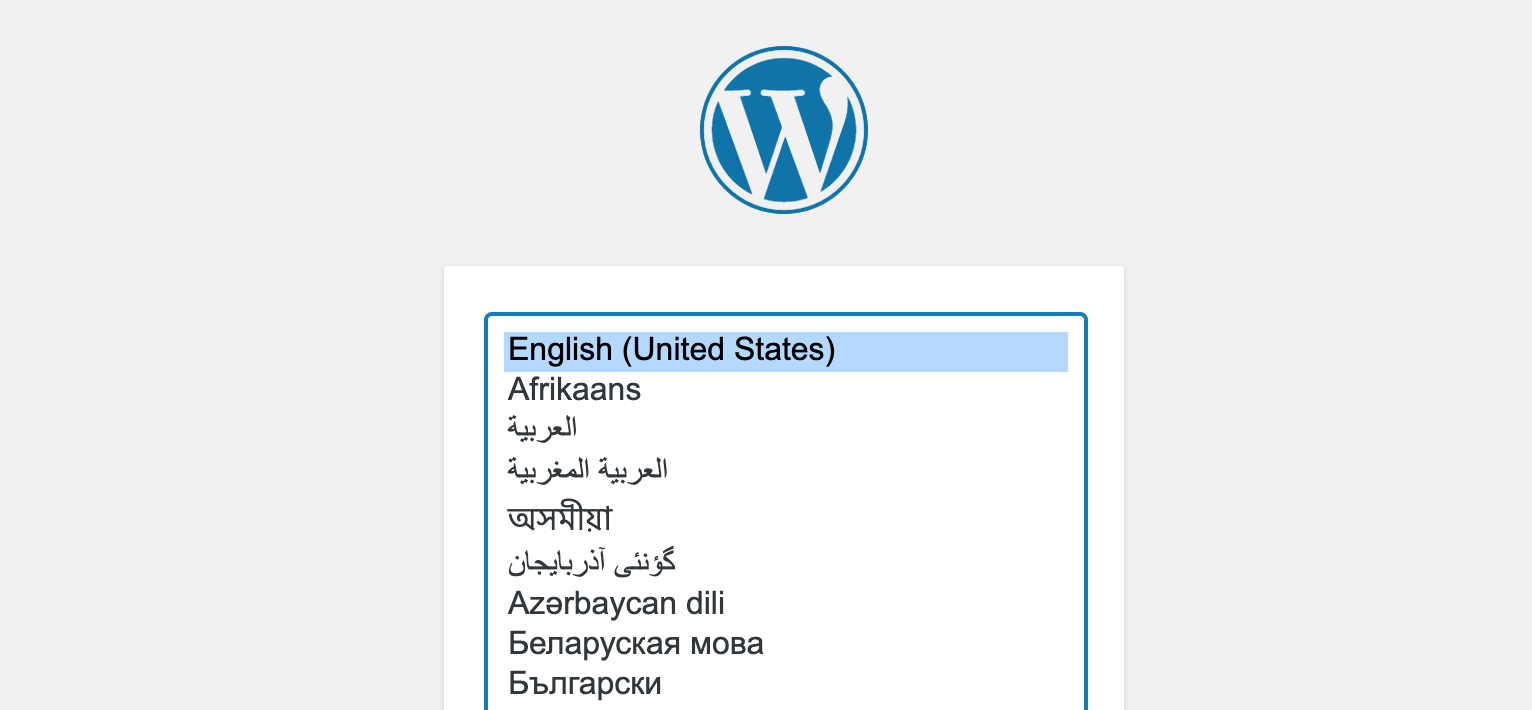
This should start a server on port 8000. Navigate to localhost:8000 in your browser. You should see the WordPress onboarding page. Select a language and click “Continue”.
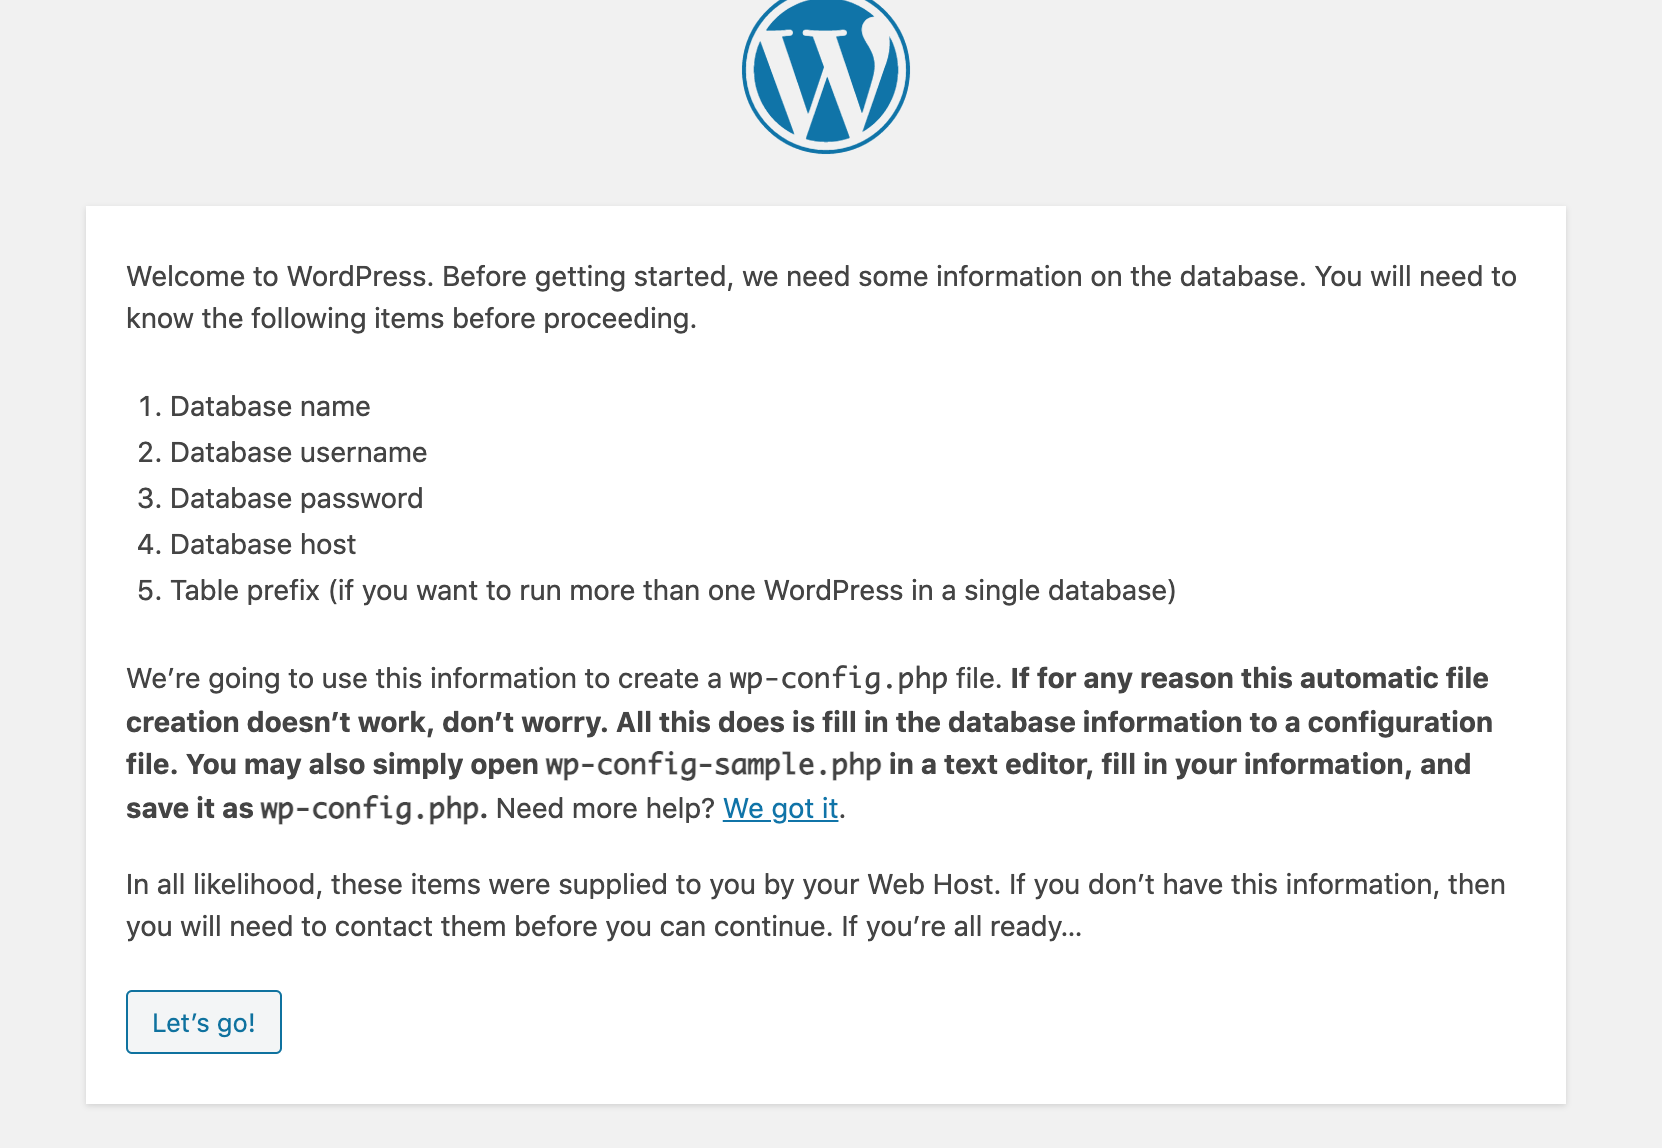
You should be presented with a prompt right after. Here, you’ll be asked to provide some database information including; name, username, password, table prefix, and host. This enables WordPress to generate all the required tables for a complete installation.
Before you continue with this step, it is important that you have the correct installation of PHP and MySQL on your PC. Here’s a guide I wrote, it should help you set up your PC for PHP development.
Once you’re sure you have them set up correctly done, fill in the details for your WP database.

- Database Name: The name of an existing MySQL database (be sure to create it first).
- The Username field is the username of any user that has access to your MySQL Database (usually “root”).
- Password: This should be the password of the MySQL user when setting up, if you didn’t set a password, you can leave this field blank.
- Database Host: Since we’re working on our local machine, this would be localhost. WP automatically sets the value, so leave it as is.
- Table Prefix: This prefix should be unique if you intend to run another WP installation locally. I’ll, however, leave this.
If everything was done correctly you should see the next screen telling you that WordPress can now communicate with your database:
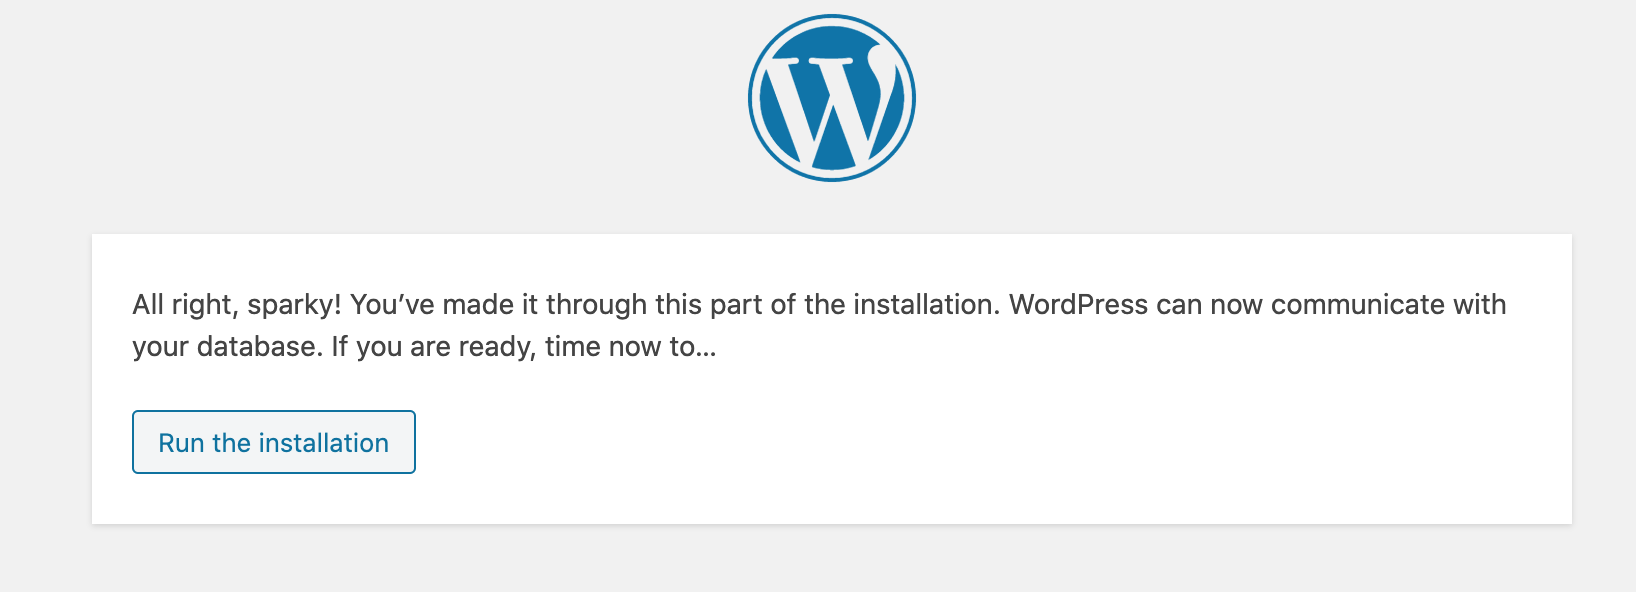
Fill in the required information and click install WordPress.

It should only take a few seconds for your installation to complete.
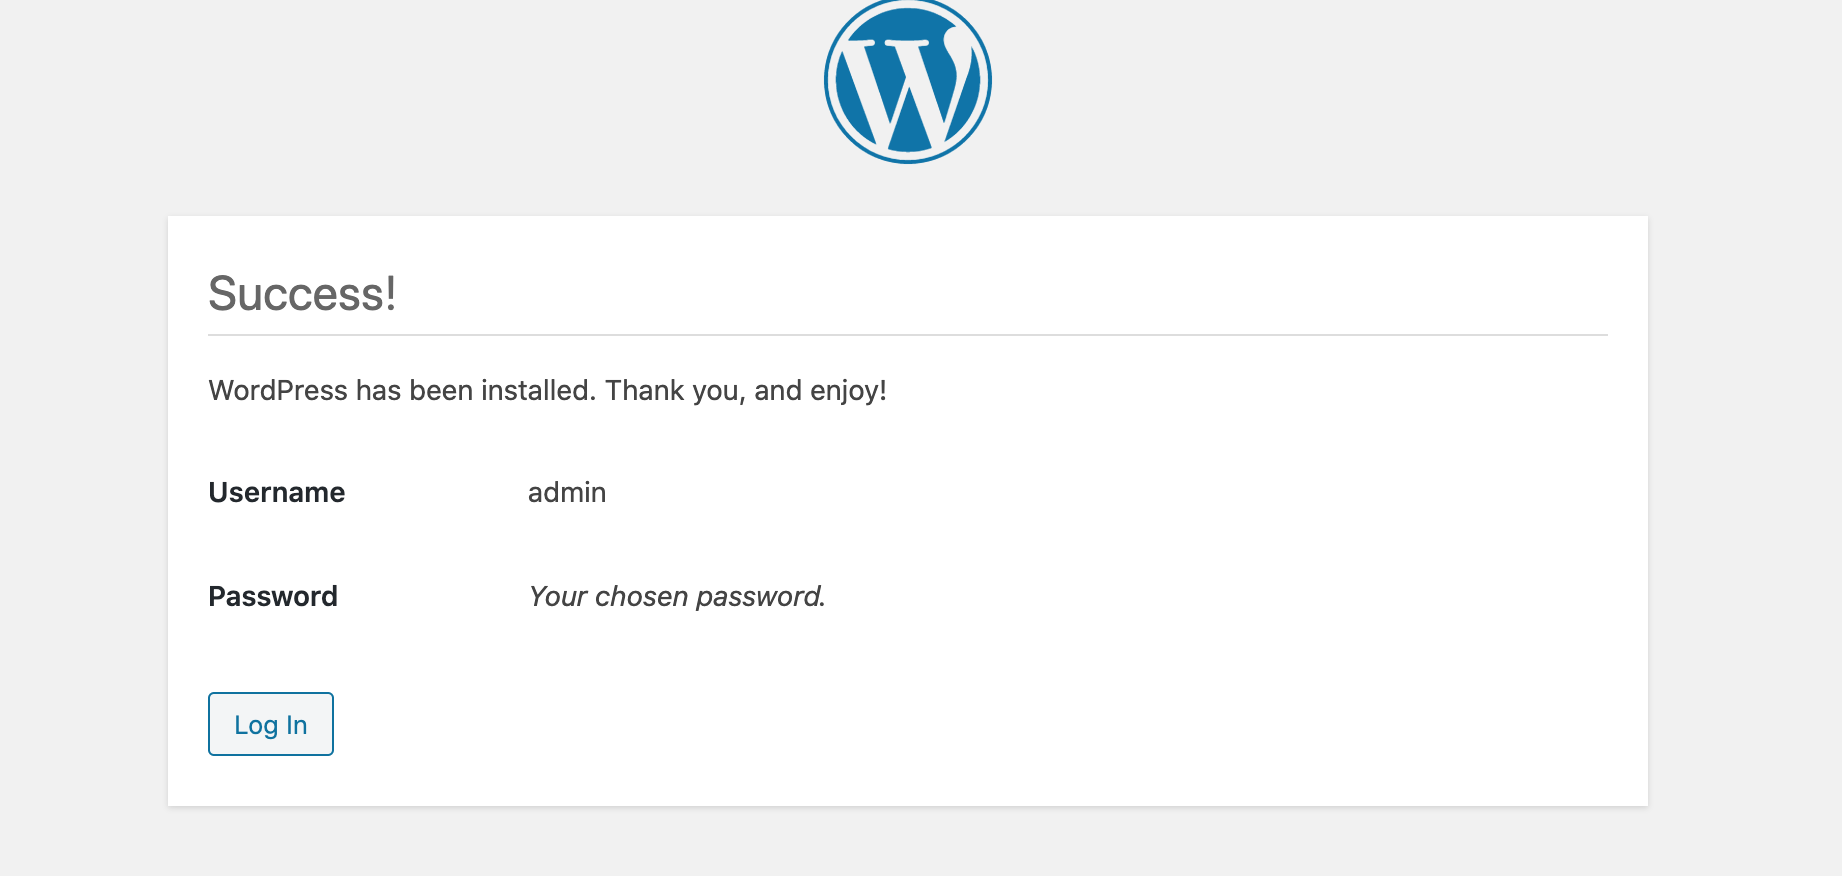
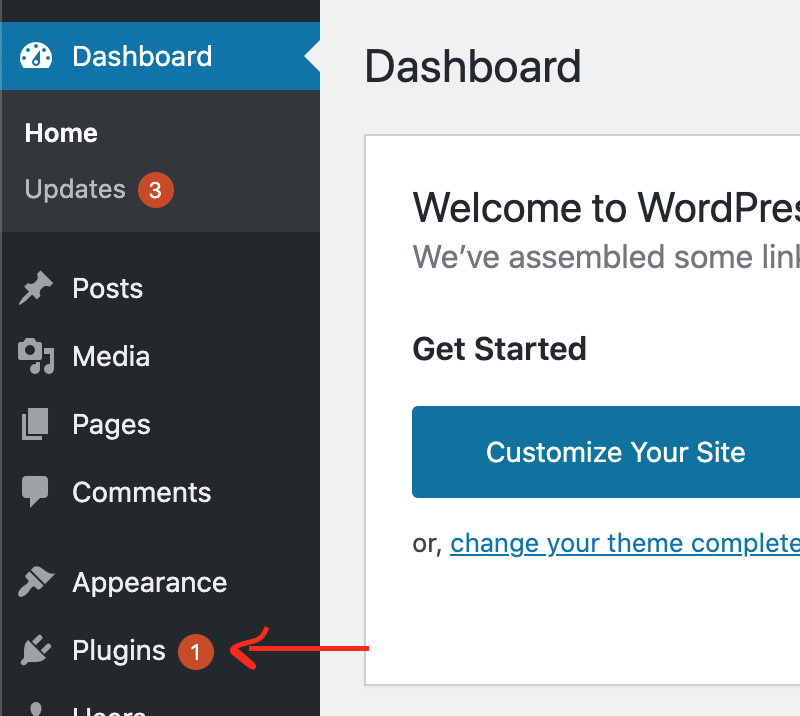
Great job! Now we have WordPress installed locally. Login with the details into your admin dashboard.
Installing WPGraphQL
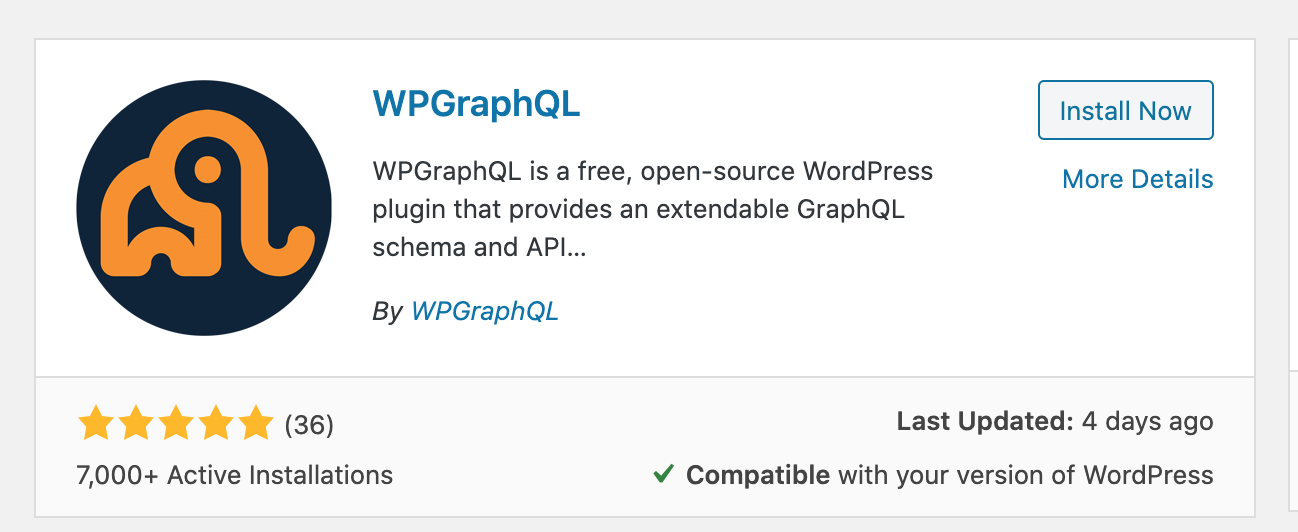
Once logged in, head over to the Plugins option and select “Add Plugin”.
Search for “graphql” and install the WPGraphQL plugin. Once installed, click on “Activate” to enable to Plugin.
You should now see a new menu option called “GraphQL” on the left.
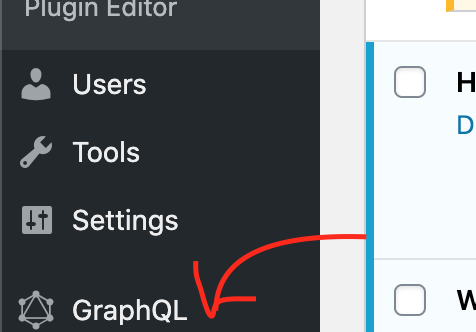
Hover on this menu option and select “Settings”, this should take you to the WpGraphQL setting page. On the settings page, you’ll be provided with the option to change the GraphQL endpoint, this determines where you’ll make queries and mutations to.
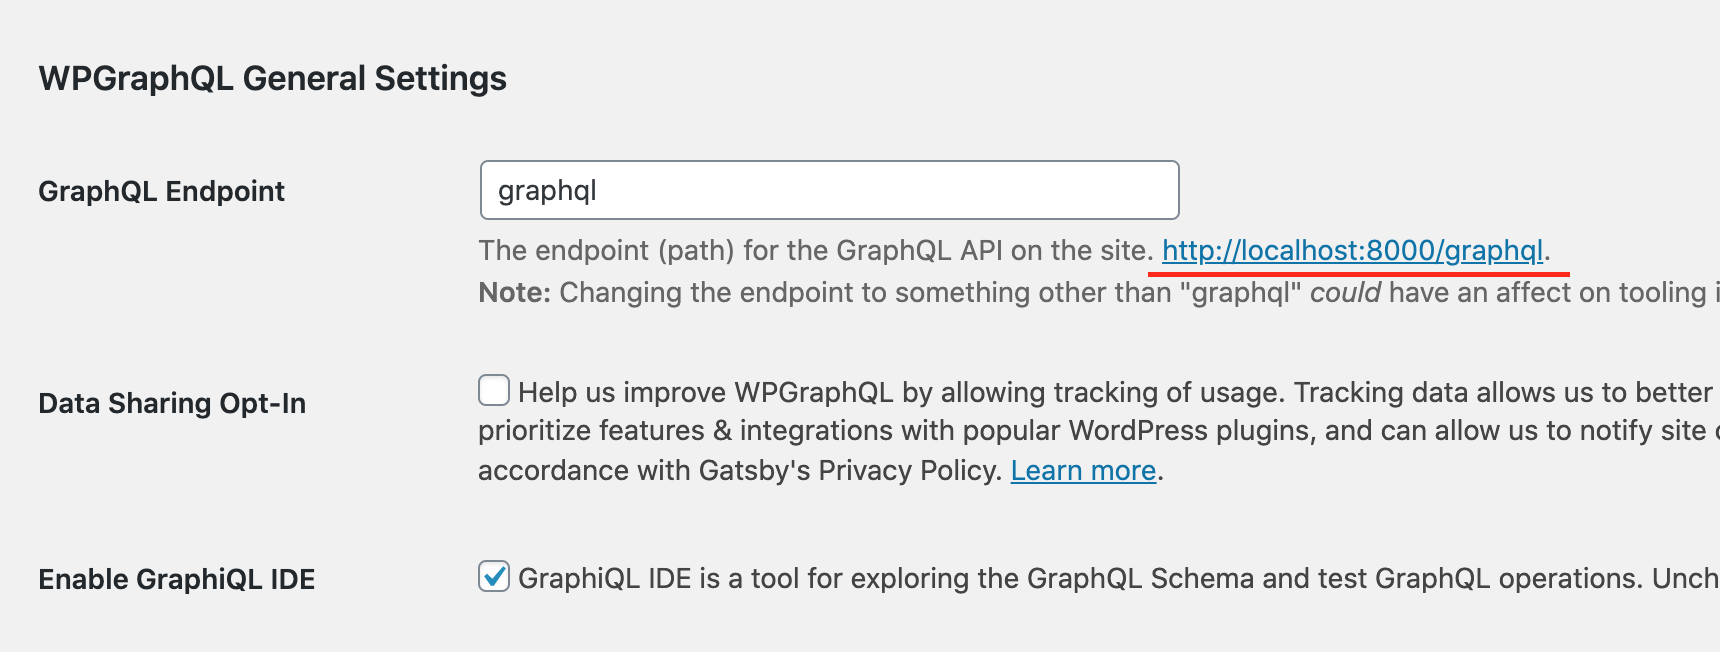
The default value is /graphqlfeel free to leave it this way, only change it if you want something different. For now, we’ll leave other settings as is.
Note: Enable the debug mode if you want more information about GraphQL errors, however, always disable this when you deploy to production:

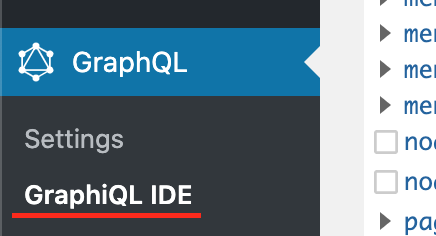
WordPress data (posts) can now be accessed using GraphQL queries. You can test out your GraphQL backend with any HTTP client like Postman or Insomnia. However, If you do not have either of these, the WPGraphQL plugin comes with an IDE preinstalled that can help you explore the Graph API. To Access this IDE, Hover on the GraphQL option in the left sidebar and select “GraphiQL IDE”.
This presents you with an interactive GraphQL IDE, where you can test mutations and queries and see the results in realtime.
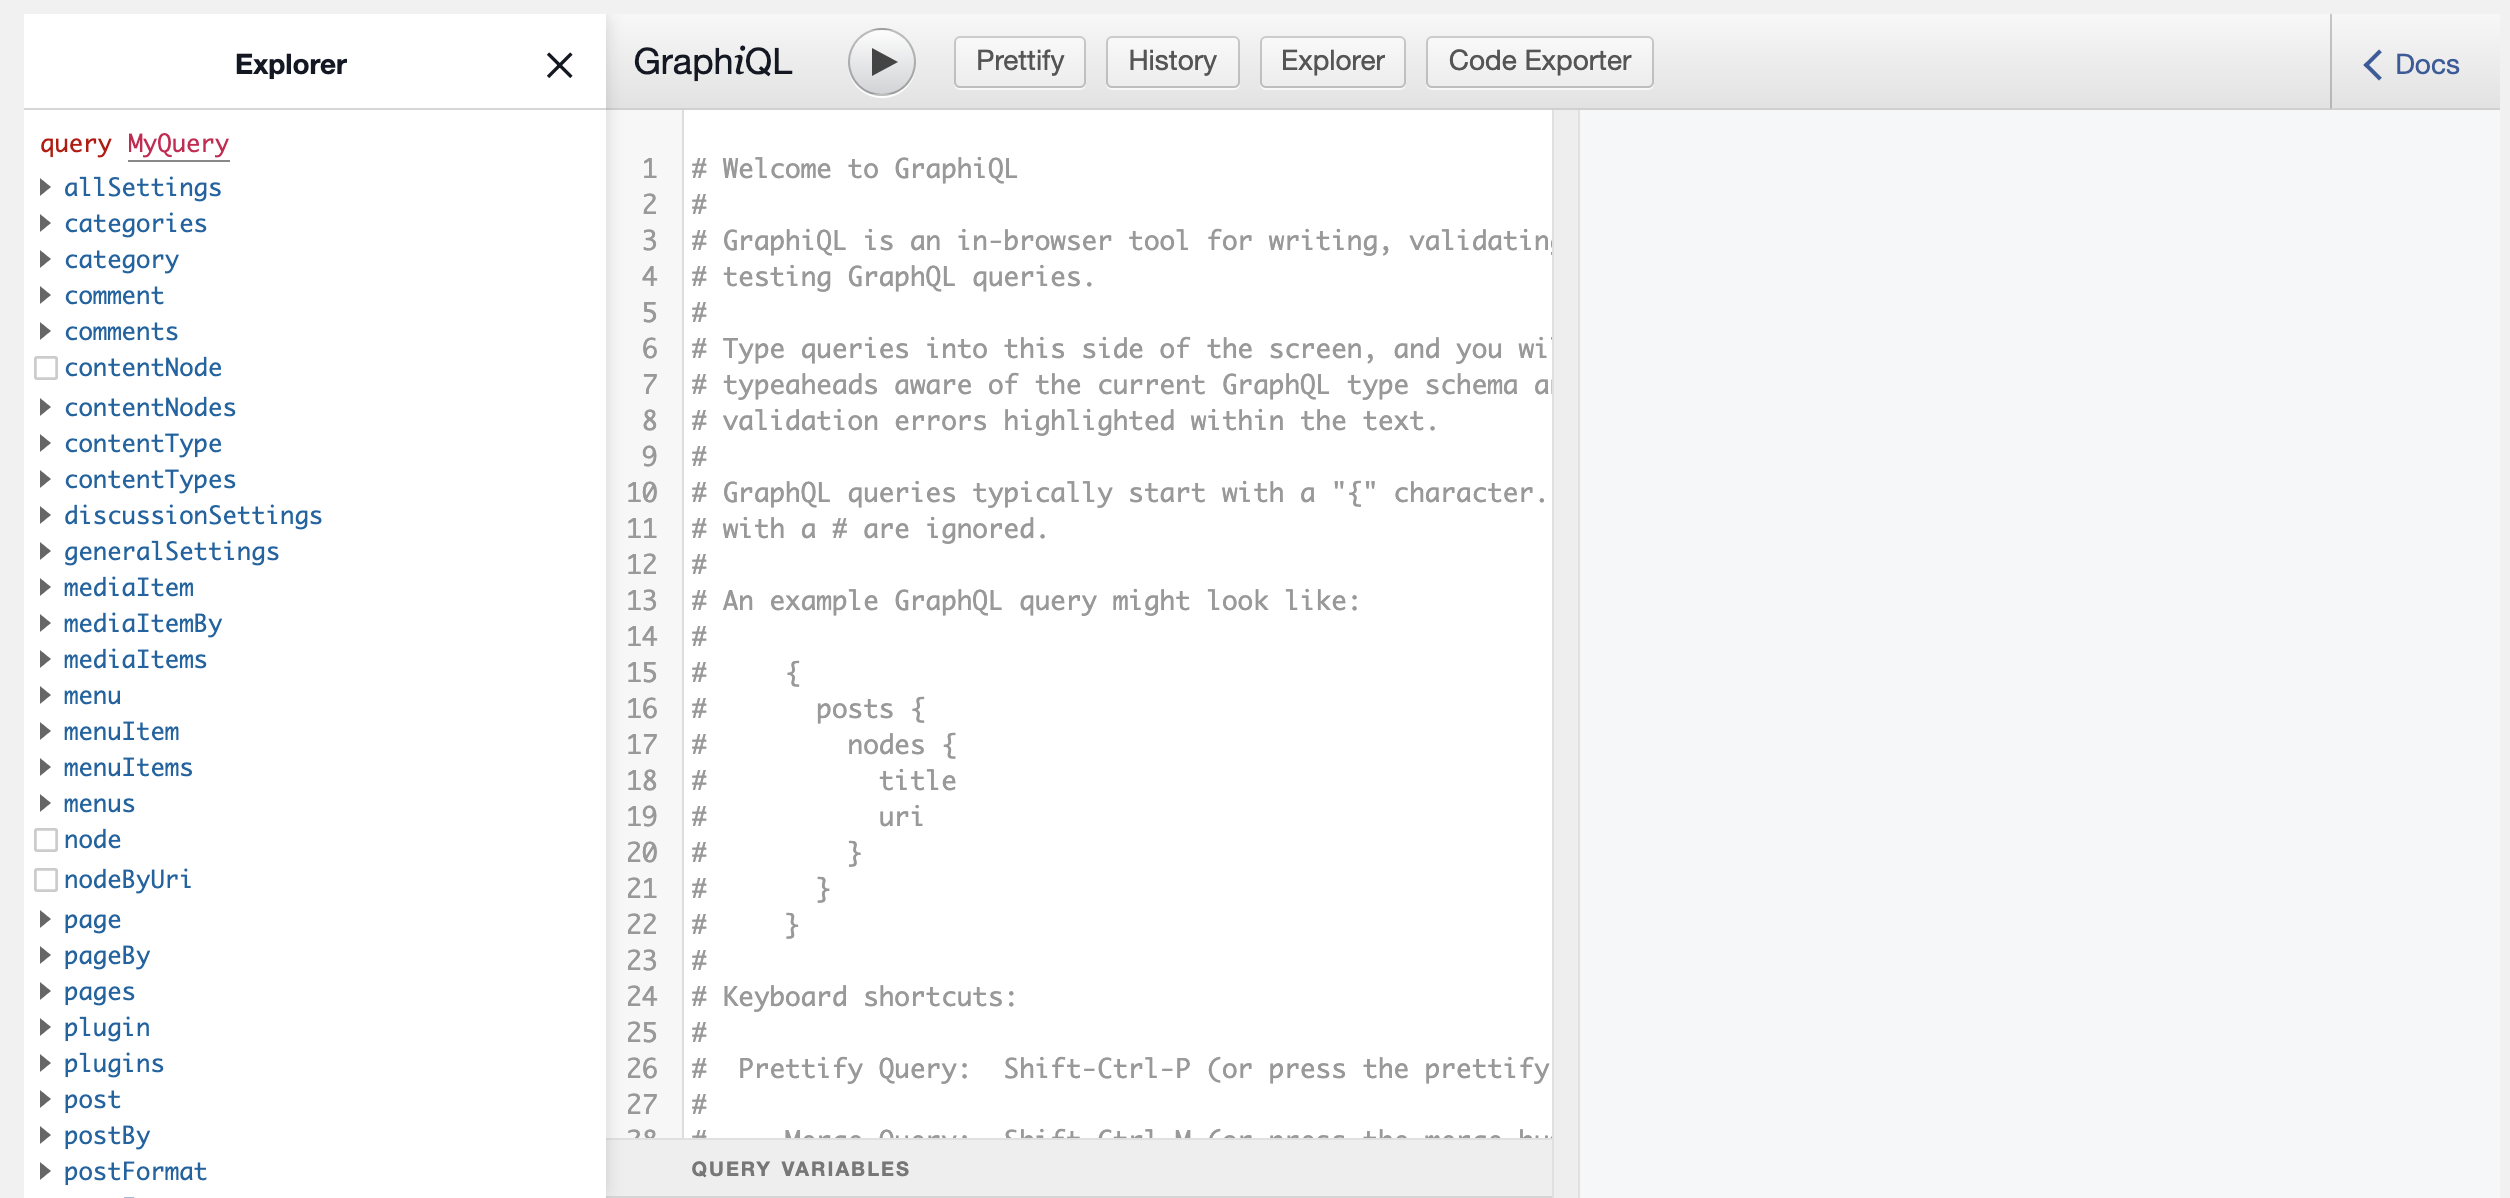
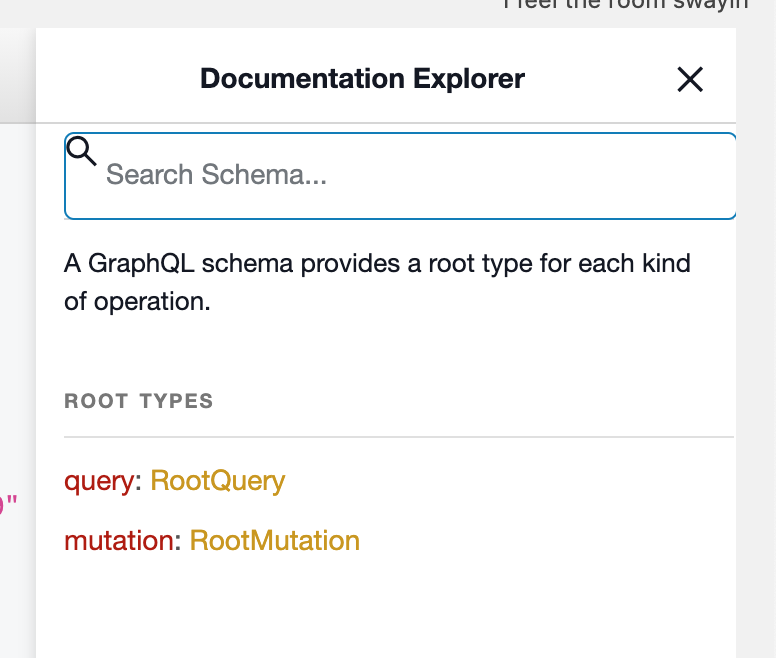
Notice the commented part of the IDE, this is where you write your queries. At the top right you can see the Docs option. This lets you explore the documentation of all the existing Schemas, the arguments they require, types, and return values. The Play icon at the top is what we’d use to run our queries to visualize the result.
Testing Graphql Queries
Let’s write some queries to test our GraphQL endpoint. We’ll fetch all posts, but only their ID and title.
query {
  posts {
    nodes {
        title
        id
      }
  }
}
You should see a result like this:
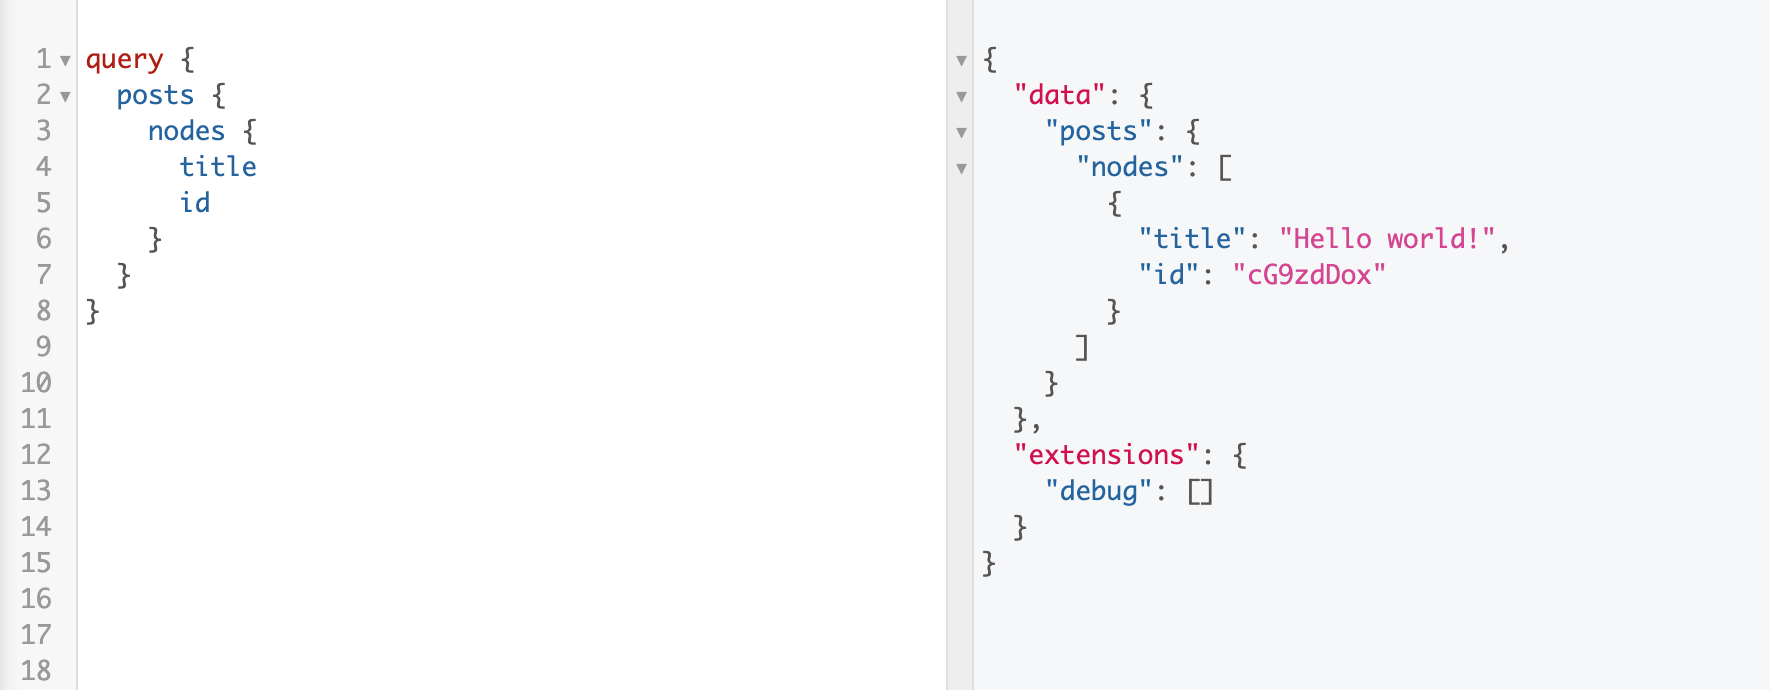
During installation, WordPress automatically creates a dummy post titled “Hello World”. Try creating more posts from your admin dashboard, then come back to the IDE and run the query again.

On the sidebar, hover on the “Posts” option and click “Add New”, write some content, and publish.
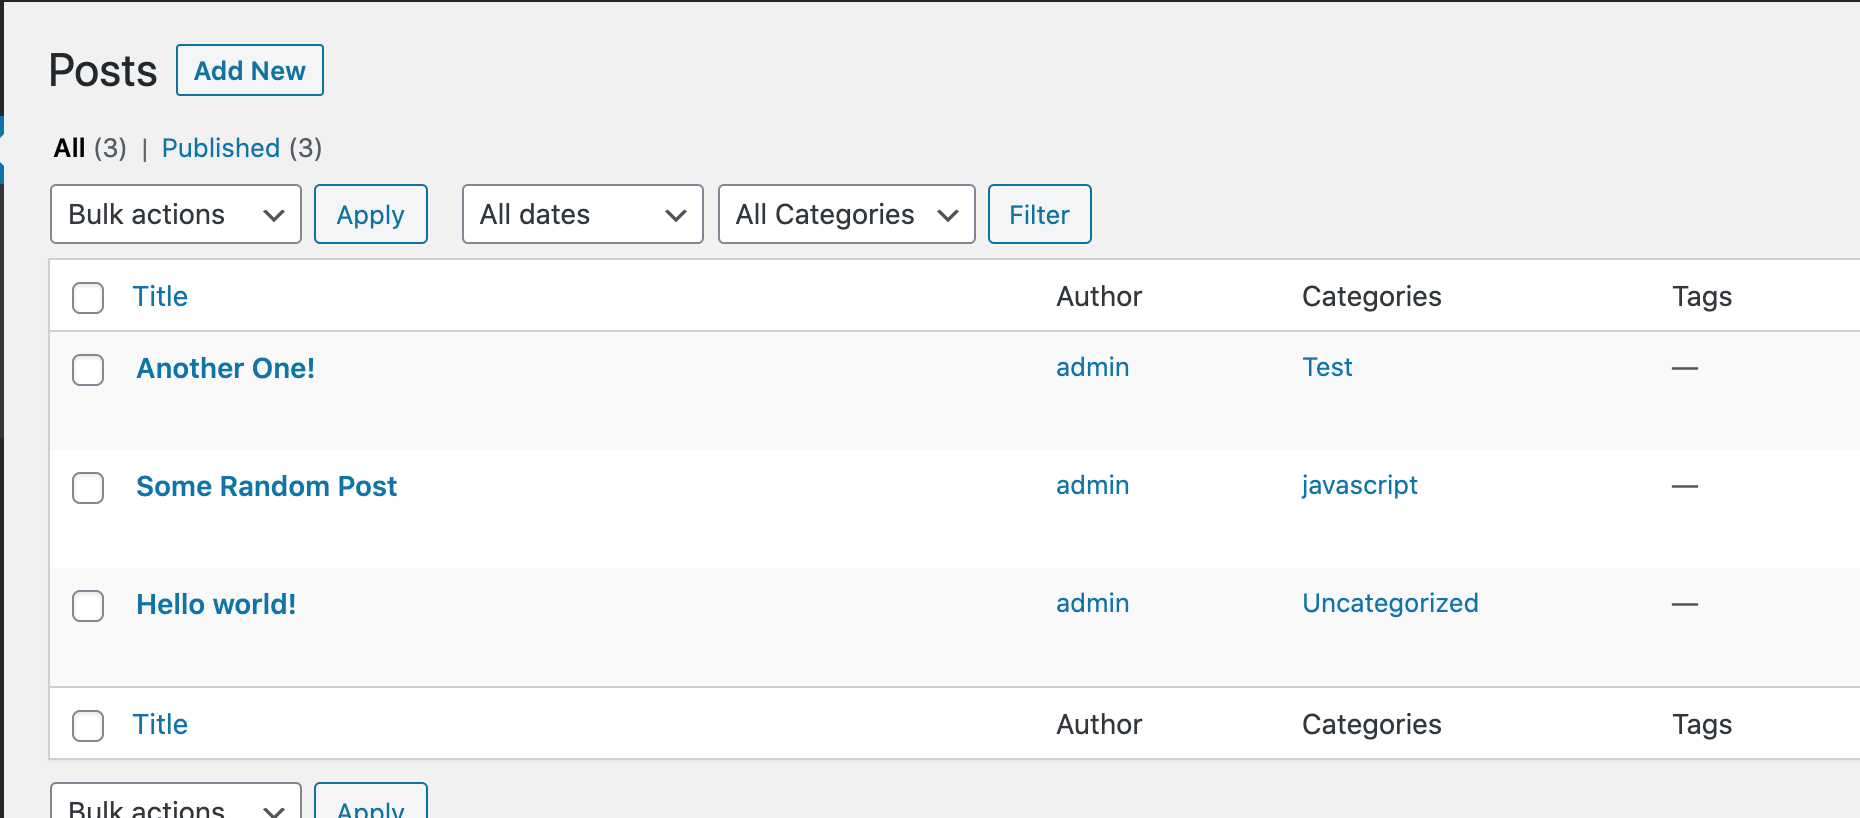
I have created two more posts and added a category for each of them. Now let’s see the new response from our GraphQL query.
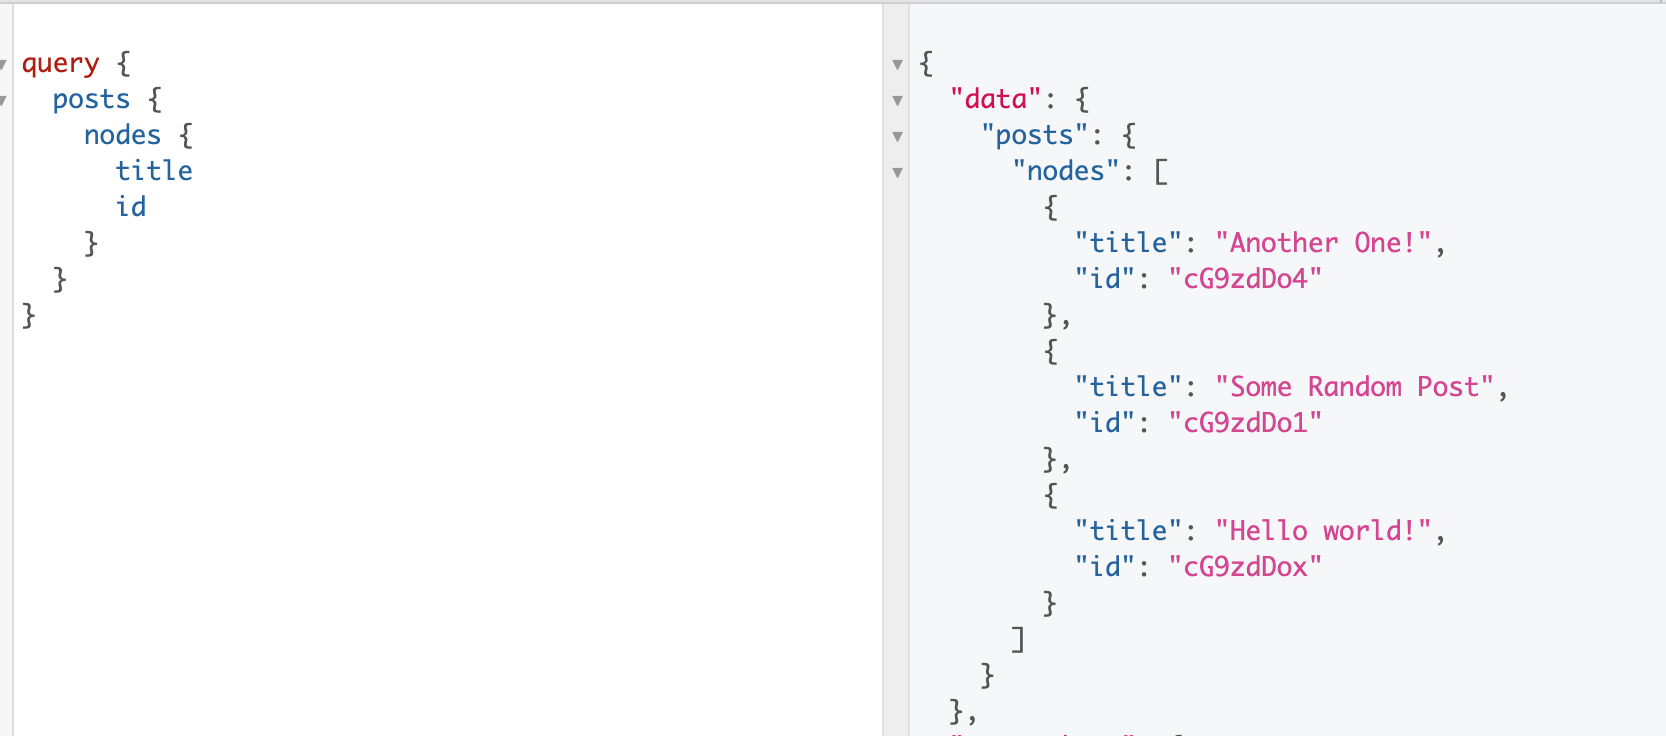
Notice we now have the two new posts that were added. Let’s query the category for each post as well.
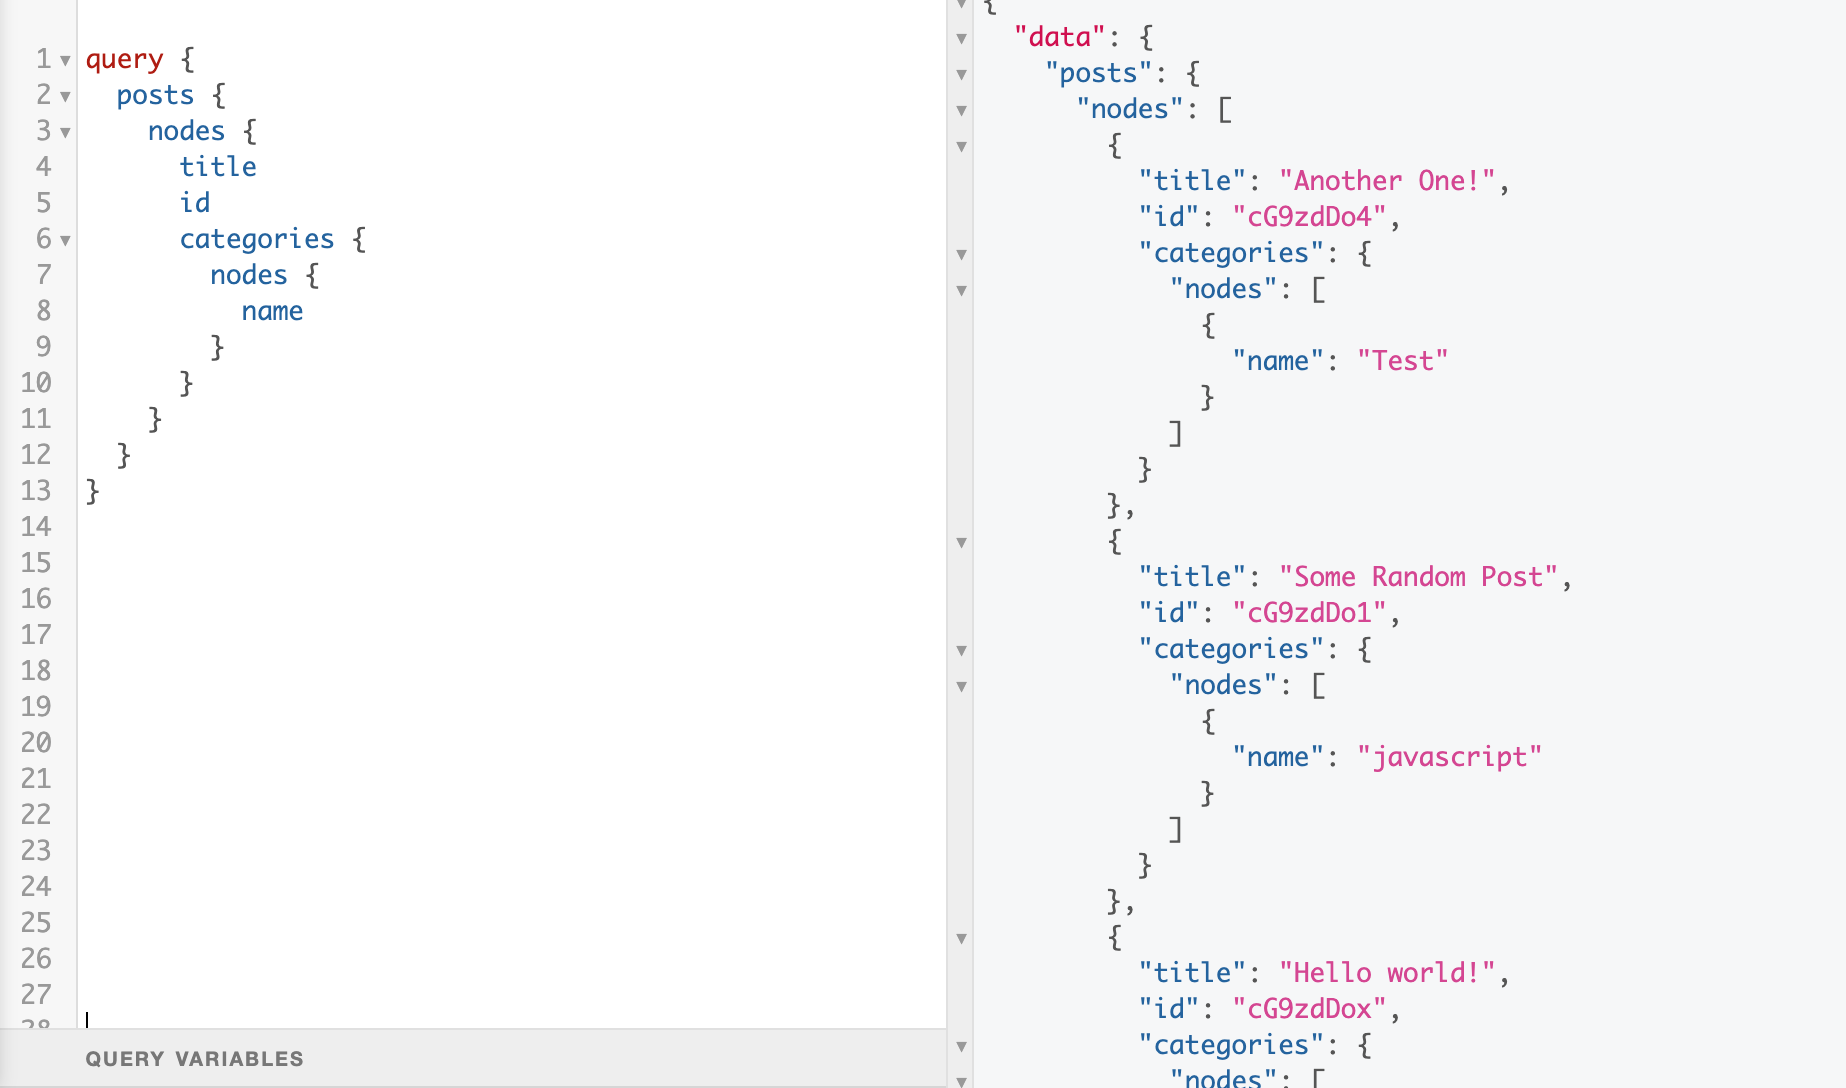
Here the category for each post is now included in the response. This way we only get the data we need. From the response above, we can see the id of each of these posts, let’s try to query a single post.
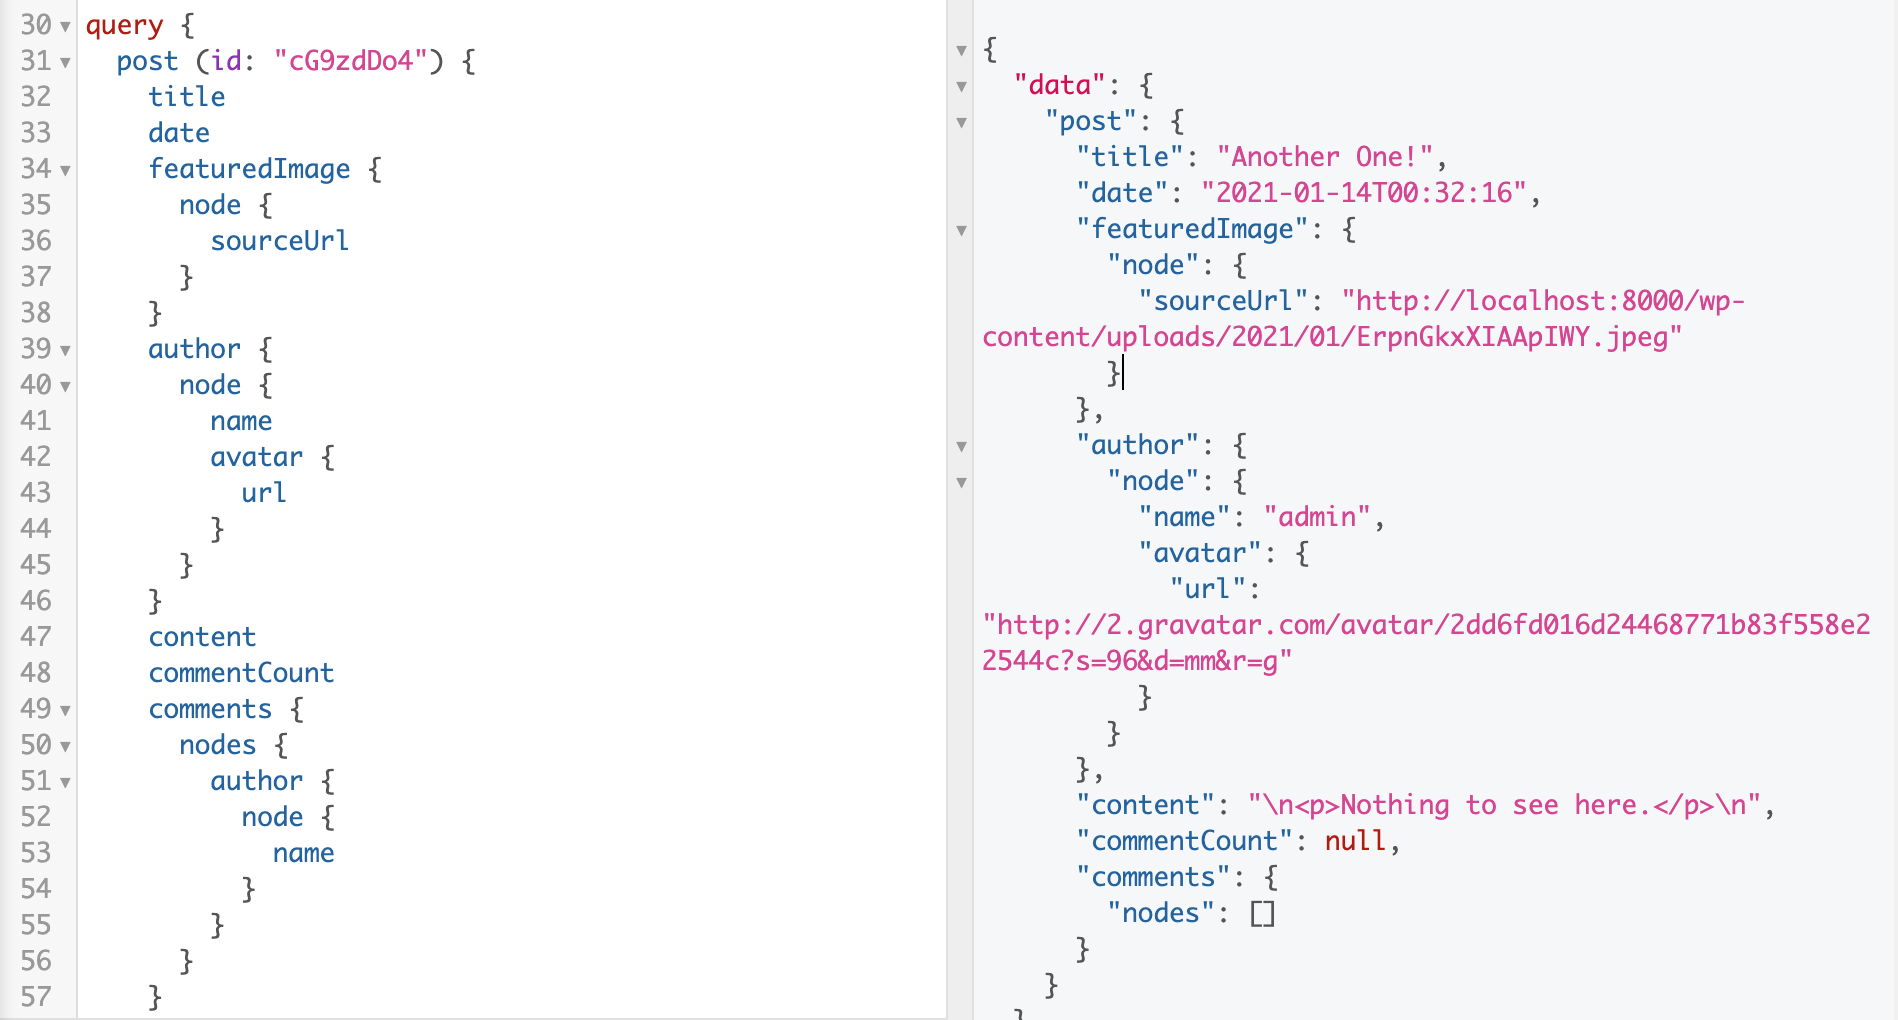
query {
 post (id: "cG9zdDo4") {
    title
    date
    featuredImage {
      node {
        sourceUrl
      }
    }
    author {
      node {
        name
        avatar {
          url
        }
      }
    }
    content
    commentCount
    comments {
      nodes {
        author {
          node {
            name
          }
        }
      }
    }
  }
}
We should get a response like so:
{
  "data": {
  "post": {
    "title": "Another One!",
    "date": "2021-01-14T00:32:16",
    "featuredImage": {
      "node": {
        "sourceUrl": "[http://localhost:8000/wp-content/uploads/2021/01/ErpnGkxXIAApIWY.jpeg](http://localhost:8000/wp-content/uploads/2021/01/ErpnGkxXIAApIWY.jpeg)"
      }
    },
    "author": {
      "node": {
        "name": "admin",
        "avatar": {
          "url": "http://2.gravatar.com/avatar/2dd6fd016d24468771b83f558e22544c?s=96&d=mm&r=g"
        }
      }
    },
    "content": "\\n<p>Nothing to see here.</p>\\n",
    "commentCount": null,
    "comments": {
      "nodes": []
    }
  }
},
This should give you a basic understanding of how to turn your WordPress website into a GraphQL Server. Next, I’ll show you how to use this data in a Vue.js Application, until then…
Cheers ☕️